Managing Studies
A study refers to a unique analysis of one or more samples and phenotypes, and is the starting point of the CSA workflow. Studies belong to projects, and you can create multiple studies using the same sample(s) in different contexts.
Reviewing current studies
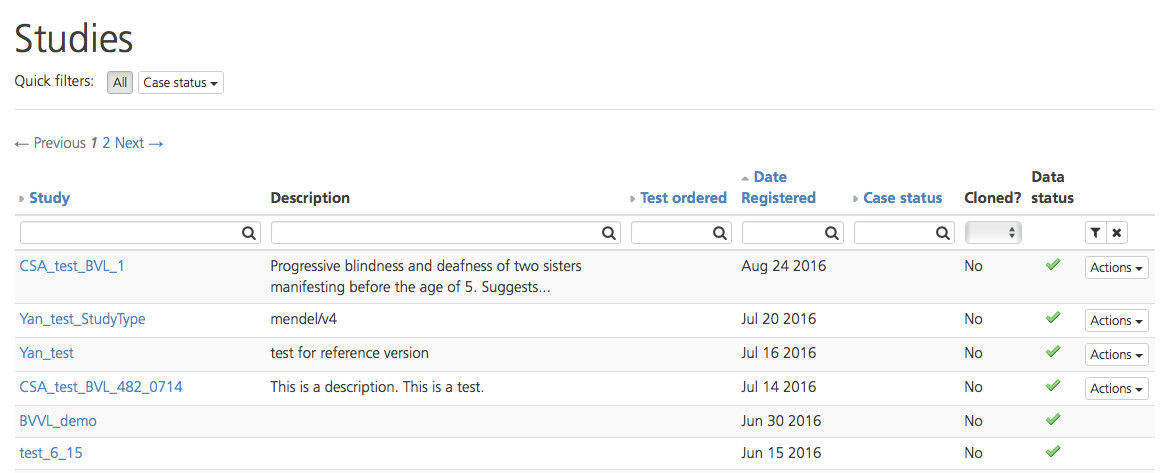
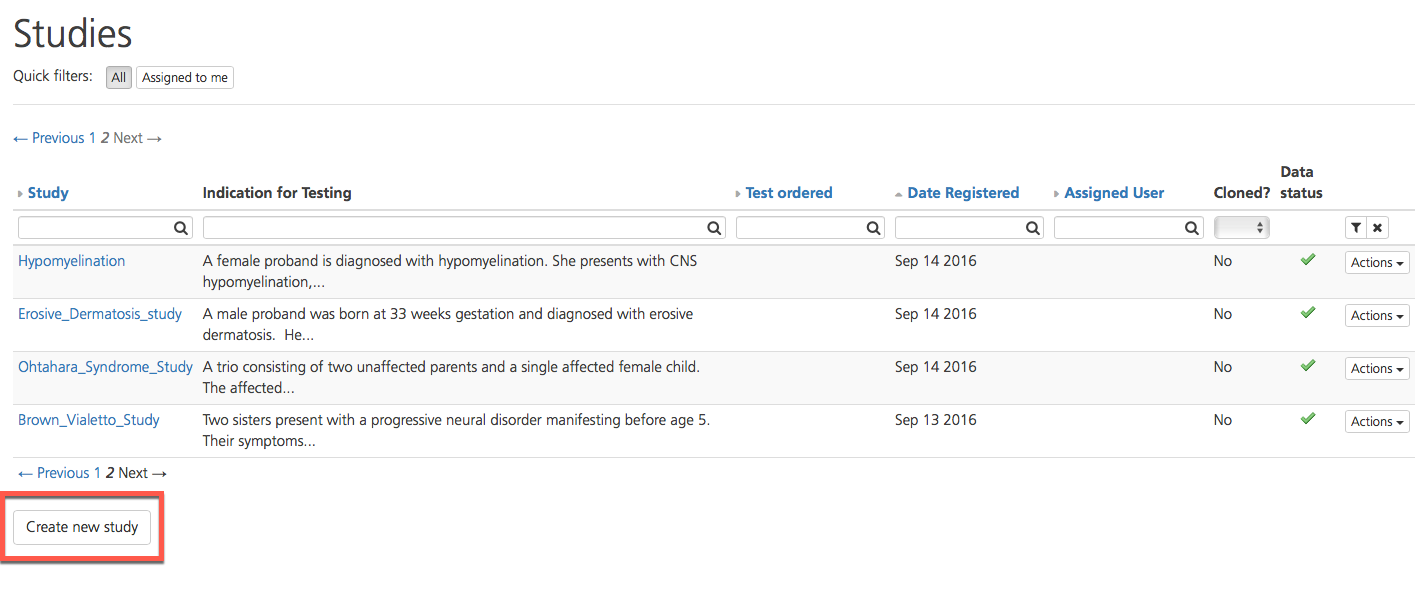
Clicking the Study View link in the CSA dashboard opens the Studies page, which lists all of the current studies you have access to in a selected project (depending on your User role), along with a number of study attributes.
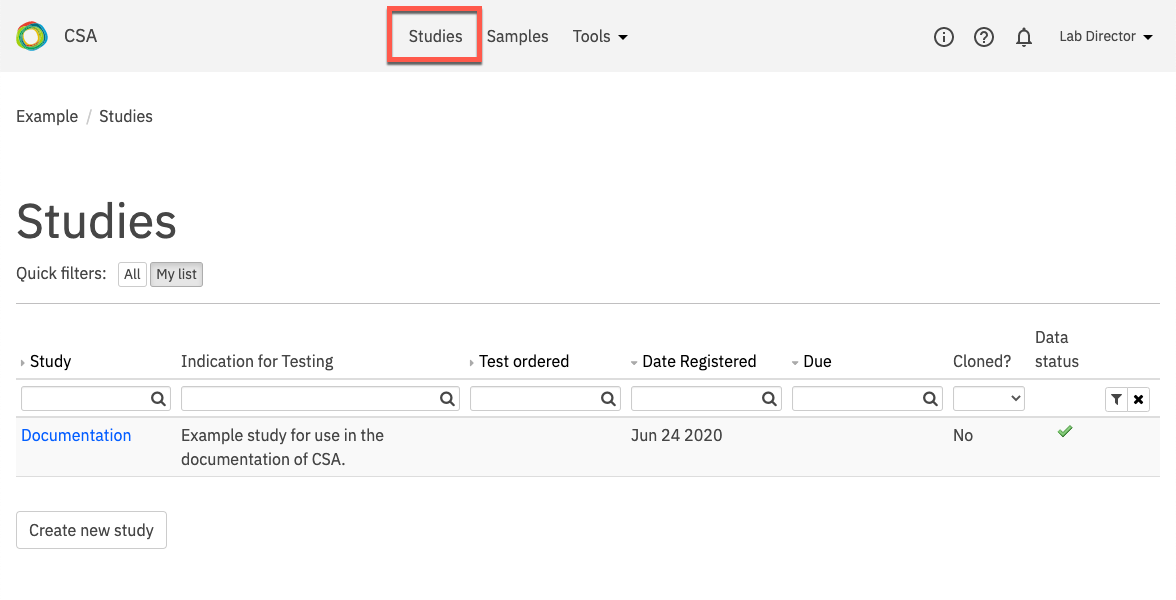
The Studies list is prioritized according to Due date. Alerts are displayed when a study is approaching the due date or is overdue.
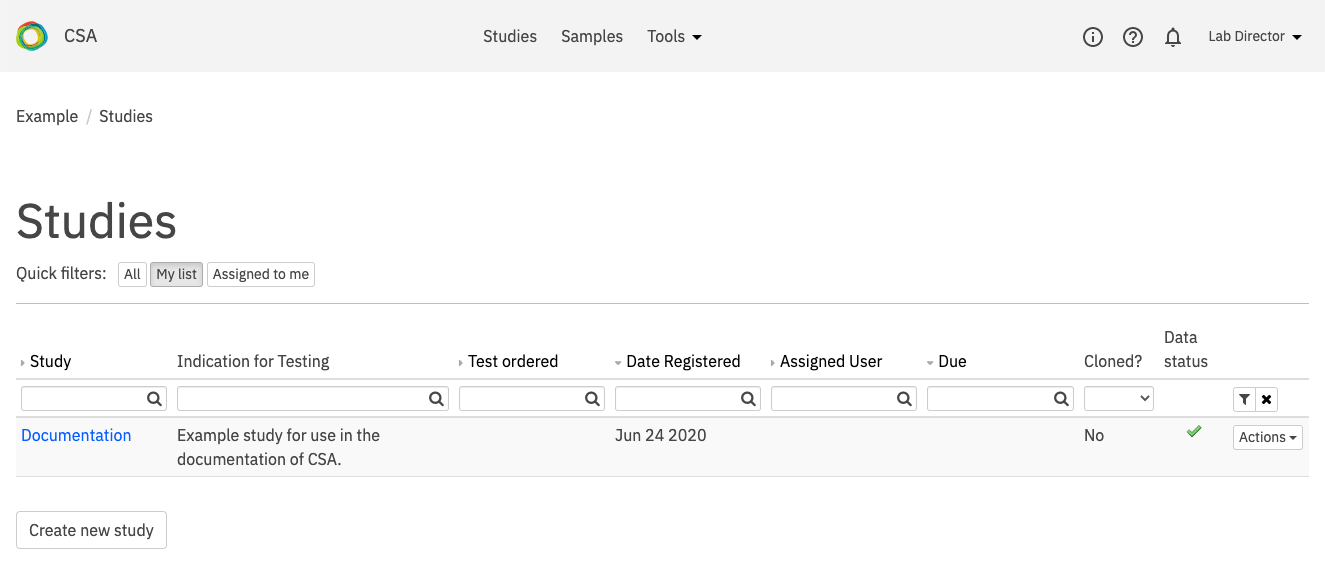
Study attributes are organized in columns, described in the table below:
Column |
Description |
|---|---|
Study |
The name of the study |
Description |
The description entered for the study when it was created (see also Creating a new study) |
Test ordered |
Specifies the sample type and handling, including the type of data files, secondary analysis, and CSA configuration |
Date registered |
The date the study was created; alerts are displayed at configured intervals (e.g., if a study is approaching the due date or is overdue) |
Workflow state |
Indicates whether the case is ready for review of the variants; available workflow states depend on the study type selected when the study was created |
Assigned user |
The user assigned to the study (see also Assigning a study) |
Due |
The due date set for the study. Due dates are flagged when a study is approaching the due date or is overdue. |
Cloned |
Indicates whether the study is a duplicate of another (original) study |
Data status |
The status of the data upload for a study, indicated by the following icons:
|
Sorting and filtering
The Studies list can be filtered using the Quick filters at the top of the page:
All - All studies that you have access to
My list - Studies that are either assigned to you or can be assigned to you, and that are in a workflow state that you may transition from (according to your user role)
Assigned to me - All studies that are assigned to you
In addition, you can use the following options for sorting, filtering, and searching:
Sort the Study, Test ordered, Date registered, Workflow state, Assigned User, and Due columns in ascending or descending order by toggling the arrow next to the column name.
Search columns by entering keywords into the search box below the column name.
To apply filters to one or more columns, enter values into the column search box and click the filter icon on the far right-hand side of the selected row. To clear the filter, click the x icon.
Actions
Click Actions to open a drop-down list with the following options:
Assign to - Select to assign a user to the study (see also Assigning a study)
Assign to me - Select to assign the yourself to the study
Clone study - Select to clone the study to another project (if allowed)
Delete study - Select to delete the study (if allowed)

Note
Actions available to a user for a selected study depend on User role and the study type and/or CSA configuration.
Viewing a study
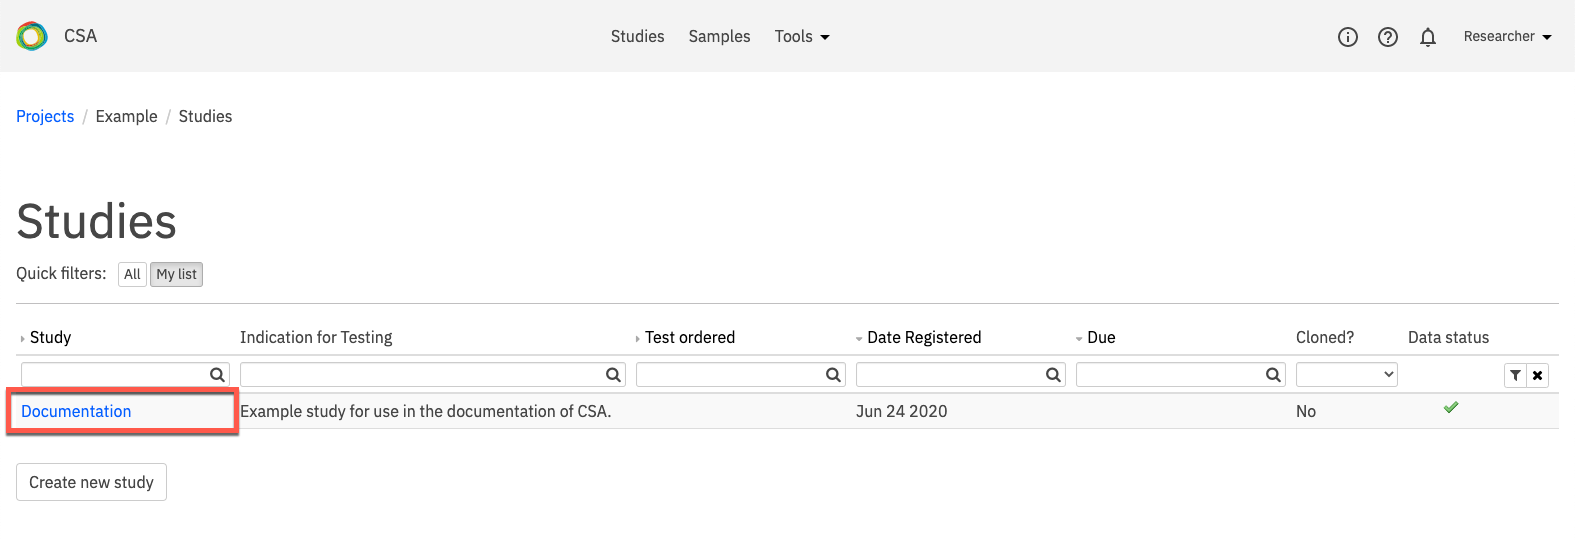
Clicking on a study name in the list opens the Study Overview, where you can view and edit details of the selected study and create a new study.
Note
Access to the Study Overview depends on User role.
Creating a new study
A study refers to a unique analysis of one or more samples and phenotypes. Creating a study is the first step of the analysis workflow in CSA. New studies are created from the Studies page in CSA .
To access the Studies page and create a new study, click the Study View link on the CSA dashboard.

At the bottom of the Studies page, click Create new study to open the Create new study page.
The Create a new study page contains several fields to enter or select information about your study, such as study participants, phenotypic features, analysis parameters, reference gene source, and, if desired, candidate gene list. Required fields are marked with an asterisk (*).
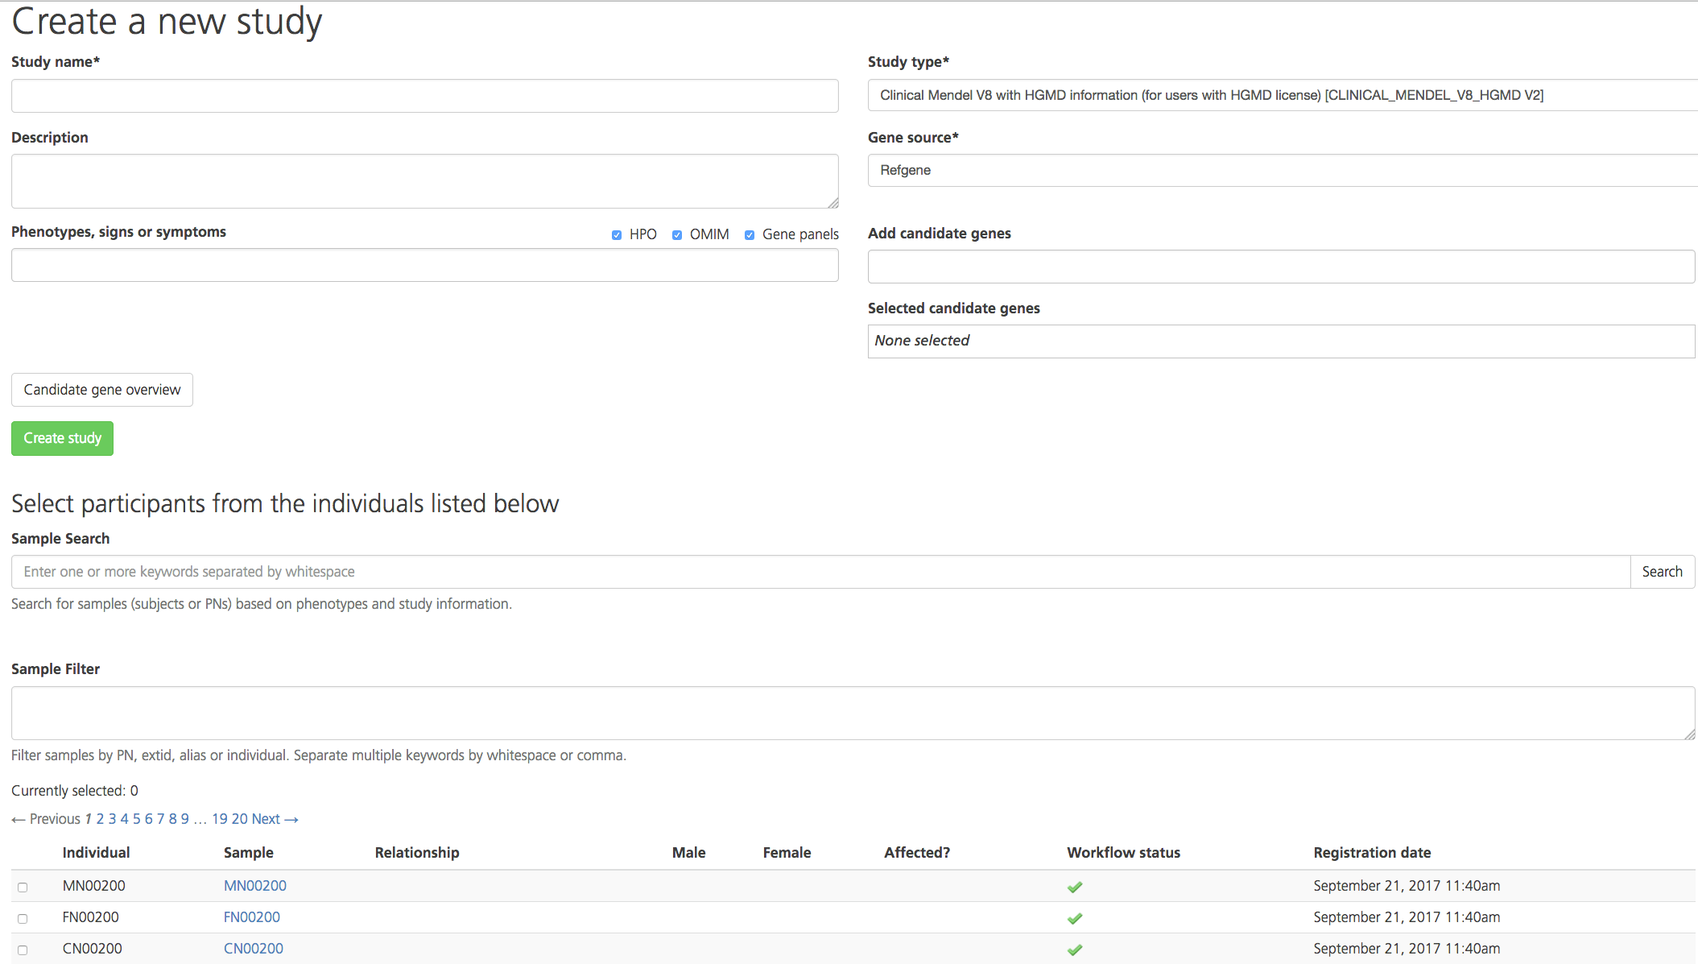
In the Study name field, enter a study name. Study names must be unique within the project and must not include spaces or special characters.
In the Study type field, select a study type (“Clinical” or “Mendel”). The Mendel study type is recommended for both single sample and small family studies because it provides broad flexibility in modifying analysis parameters in the Advanced report settings tab of the Study Overview (or Report settings tab of the Advanced report). The Clinical study type lets you create a list of candidate genes but all other analysis parameters are fixed to the recommended defaults seen in the Mendel study type.
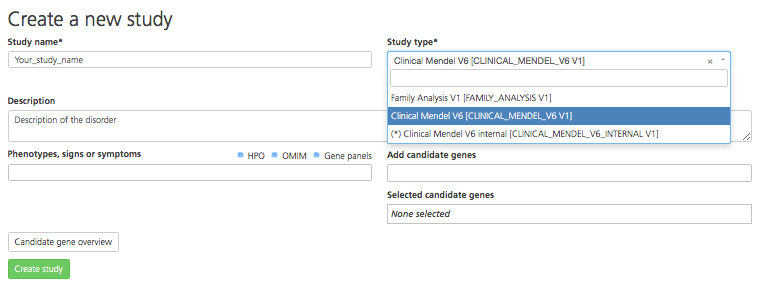
In the Description field, add a free-text description. This field is typically used to enter clinical information about the case.
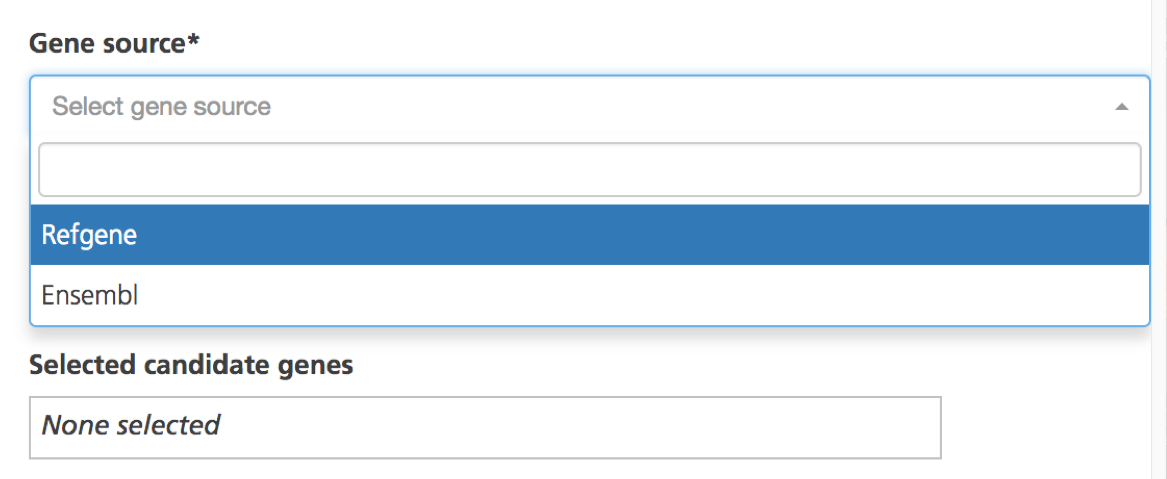
In the Gene source field, select the gene source. There are two available choices for the Reference Gene database: RefGene, a clinically verified and more conservative database usually selected by clinical scientists; and Ensembl, which contains transcripts that are not necessarily clinically verified, and therefore often preferred by research scientists. While the selections cannot be changed, you can create two studies for the same participants if necessary.
Add Phenotypes:
In the Phenotypes, signs or symptoms field, add the phenotypes, signs or symptoms of the affected individuals in the study. Phenotypes entered here will be made available in the Advanced report settings tab of the Study Overview. Alternatively, phenotypes can be added in the Participant setup tab of the Study Overview after the study is created.
This field uses the clinical descriptions of a case to suggest candidate genes for analysis. This can be used to create a candidate gene list and/or define patient cohorts across the project based on phenotypes.
Full or partial terms entered are mapped to the phenotype and disease databases Human Phenotype Ontology (HPO) and Online Mendelian Inheritance in Man (OMIM) and/or commercial gene panels. If the term entered matches HPO or OMIM descriptions, a drop-down list appears with the HPO or OMIM codes for the matching descriptions (HPO codes are preceded by “HP:”, while OMIM codes are preceded by only the numeric OMIM ID). Additional gene lists may be selected from a compilation of commercial gene panels. The panels will indicate the panel ID and commercial source (e.g., Qiagen, GeneDx).
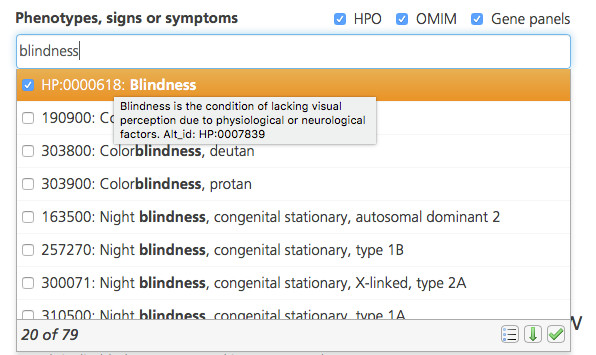
By default, the drop-down list displays the top 20 matching codes. To see more matching codes, click the arrow icon () at the bottom of the drop-down list. Hovering the cursor over a code in the list opens a tooltip with the full description.
Select one or more codes by selecting the checkboxes. To select all matching codes, click the Select all icon () at the bottom of the drop-down list. Selections may include many phenotypes for a single common term so be sure to carefully review the available terms before selecting all of them.
For multiple phenotypes, enter terms one by one and select the matching codes.
Once you’ve selected the desired codes, click the checkmark icon () to save your selections and add them to the phenotype list. Genes assigned to the selected phenotypic codes are added to the study’s candidate gene list.
Add Candidate genes:
In the Add candidate genes field, enter the gene symbol for candidate genes of interest (e.g., HBB). This field is used to define candidate genes, including those associated with the phenotypes, signs, or symptoms of the affected individuals. Enter full or partial gene names to open a drop-down list of matching genes. The text search uses the gene name, alias, and description. Hovering the cursor over a gene in the list opens a tooltip with the gene description.
Select one or more genes by selecting the checkboxes. To select all matching genes, click the Select all icon at the bottom of the drop-down list.
For multiple genes, enter the gene symbols one by one and select the matching genes.
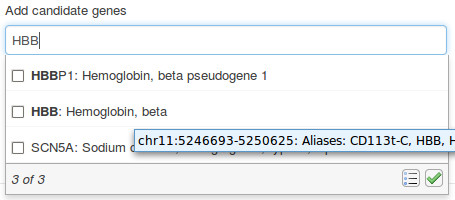
Once you’ve selected the desired genes, click the checkmark icon to save your selections. Genes selected in the Add candidate genes field (i.e., not derived from a phenotype entry) are displayed in the Selected candidate genes field. To see the gene symbol, gene name, and corresponding terms for the selected genes, click Candidate gene overview.

Add Participants:
Select at least one participant for inclusion in the study from the list of individuals whose samples have been uploaded to the Genuity Science system. Alternatively, participants can be added in the Participant setup tab of the Study Overview after the study is created.
To find participants, type a keyword such as a phenotype term, attribute, or PN into the Sample Search box.

To find participants based on a PN-specific term, enter the term in the Sample Filter box.

Select participants by selecting the checkboxes in the leftmost column, next to the Individual ID. Selected rows are initially highlighted in yellow.
Each study must include a single index case. In the Relationship column, designate one index case. For all other participants, designate the relationship to the index case. When the Relationship field is designated for a participant, the row is highlighted in green.
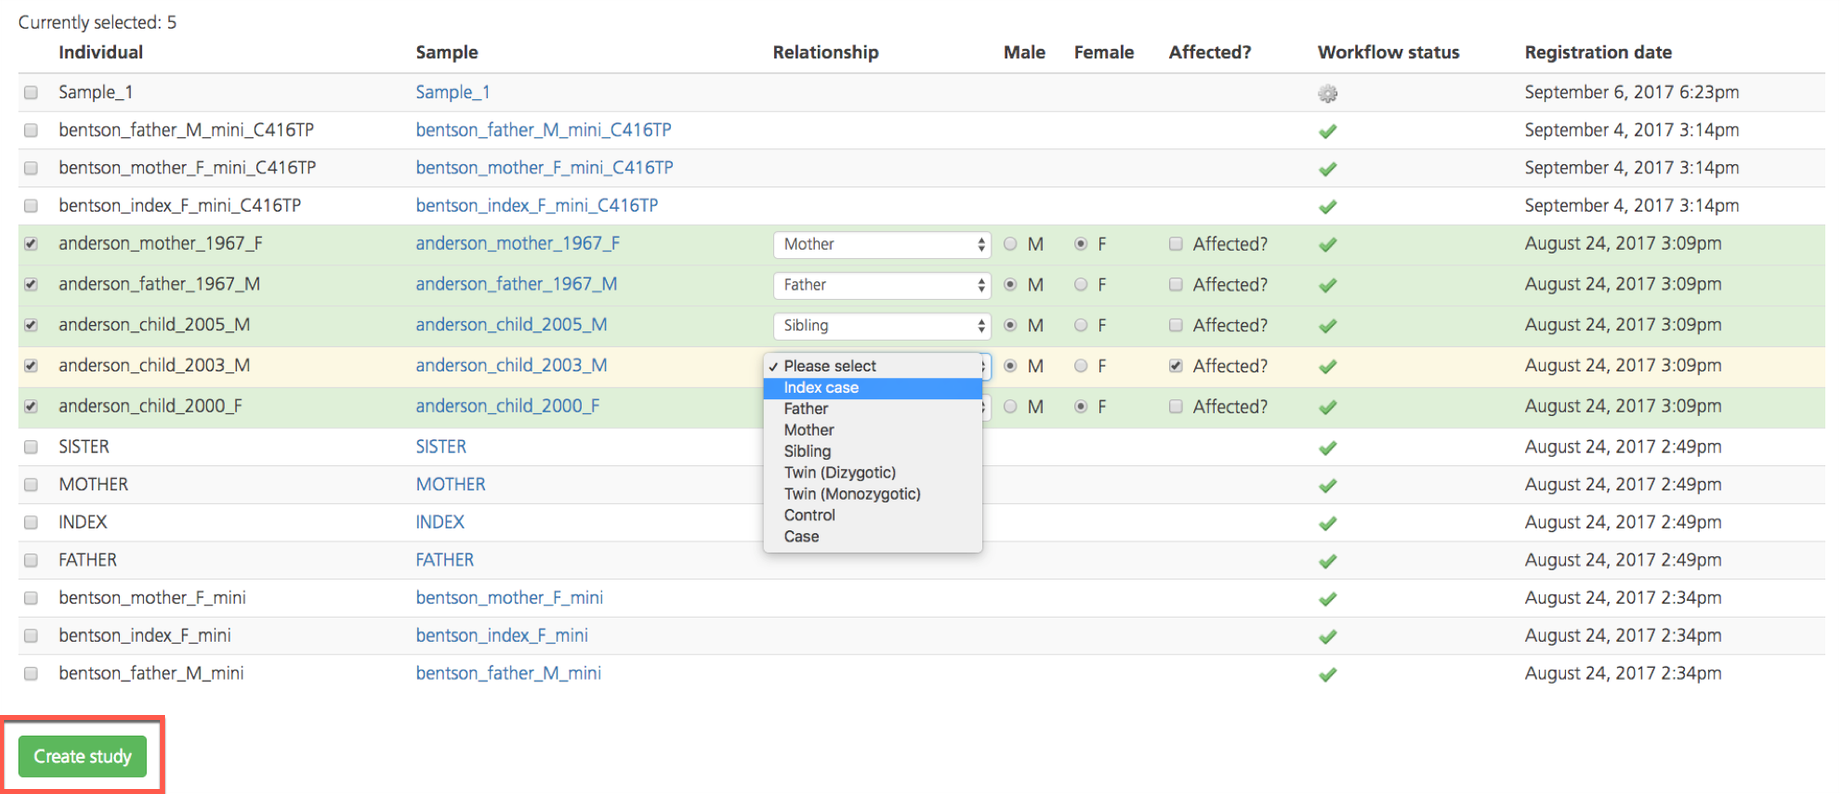
In the Affected column, designate the affected/unaffected status of the index case and all other participants.
The Male and Female columns are automatically designated for each participant depending on how the sample was categorized at the time of upload.
In the Workflow status column, a green checkmark indicates that the data for the selected sample is ready for analysis. If the green checkmark is NOT displayed for the sample, variant analysis that includes this sample will fail.
The Registration date column shows the date the sample was registered in the project.
To save your entries and create the study, click Create study.
Note
Failure to designate a index case in the Relationship column will result in an error message.
The saved study can be now be viewed and selected for analysis on the Studies page.
Assigning a study
Studies can be assigned to yourself or to other users from the Study view or from the Workflow settings tab of the Study Overview.
From the Study view
To assign a study from the Study view, open the Studies page and locate the study you want to assign in the list.
Open the Actions menu on the right-hand side of the selected row and select Assign to me to assign the study to yourself or Assign to assign the study to another user.

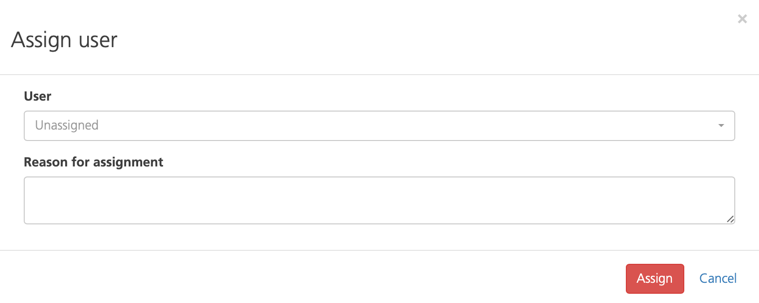
If assigning the study to another user, select a User and enter a Reason for assignment in the Assign user dialog. Click Assign to finish.
From Workflow settings
If have the Lab Manager or System Admin user role, you can also assign studies from the Workflow settings tab of the Study Overview page of the selected study.
With a Lab Manager role, the screen below will be shown when you open a study. You can set the due date and assigned user for this study along with any notes for the assignee.
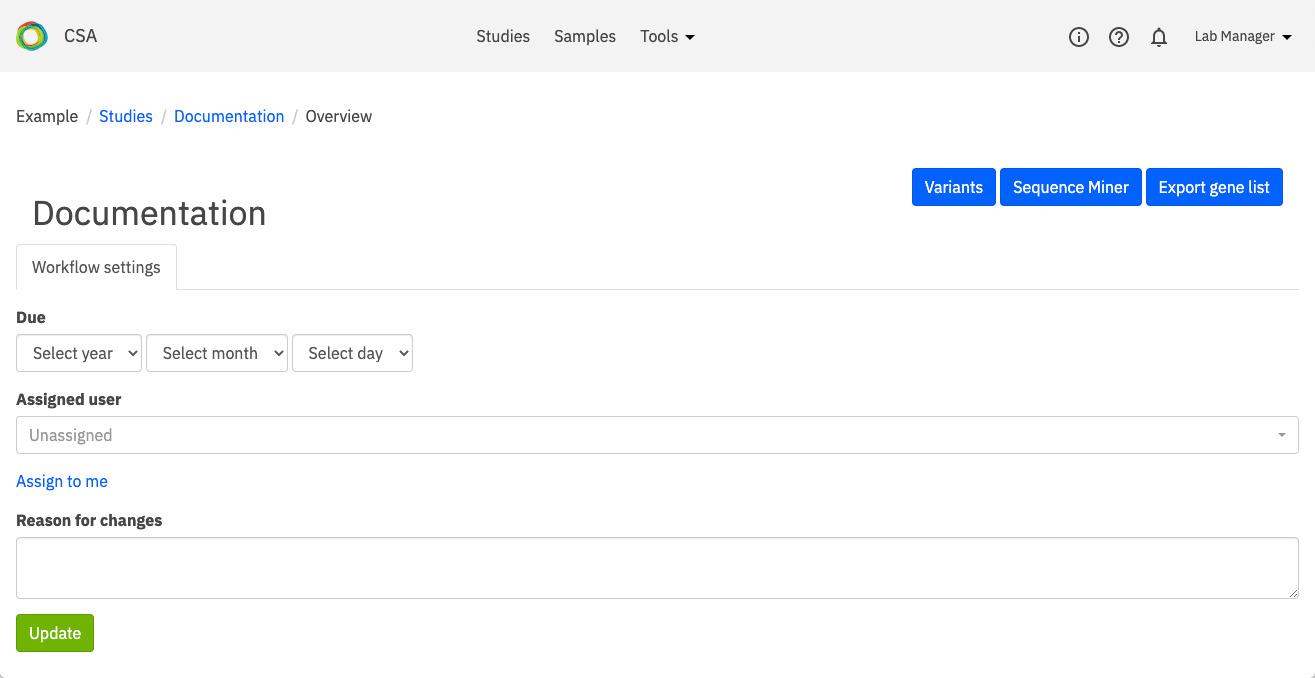
In the Assigned user field, select a user from the drop-down menu. Click Update at the bottom of the page to save the user assignment.
Note
The ability to assign studies depends on the User role assigned to the user.
If assigning the study to another user, select a User and enter a Reason for assignment in the Assign user dialog. Click Assign to finish.

