Users and User Roles
Users in CSA are assigned to User roles. User roles determine the level of access granted to a study, project, or organization. Users can have multiple roles. Roles are managed by your CSA system administrator (for information about administering User roles, refer to the Administration Manual).
Researcher |
Variant Scientist |
Variant Approver |
Lab Director |
Lab Manager |
User Admin |
Project Admin |
Org Admin |
Support Admin |
System Admin |
|
|---|---|---|---|---|---|---|---|---|---|---|
Can access unassigned studies |
|
|
|
|
|
|
|
|
|
|
Can access assigned studies that are not “Assigned to me” |
|
|
||||||||
Can invite users to projects |
|
|
|
|
||||||
Can edit projects |
|
|
|
|||||||
Can clone studies |
|
|
|
|
|
|
|
|||
Can manage credentials for projects |
|
|
|
|
||||||
Can create projects |
|
|
|
|||||||
Can clone samples |
|
|
|
|
|
|
||||
Can set variant status to “Approved” |
|
|
|
|||||||
Can approve clinical reports |
|
|||||||||
Can edit the Due date of an assigned or unassigned study |
|
|||||||||
Can set the workflow state to Closed state/Case Complete |
|
|||||||||
Can access the Admin panel |
|
Note
The assigned user of a particular study can also edit the due date for that study.
Updating account settings
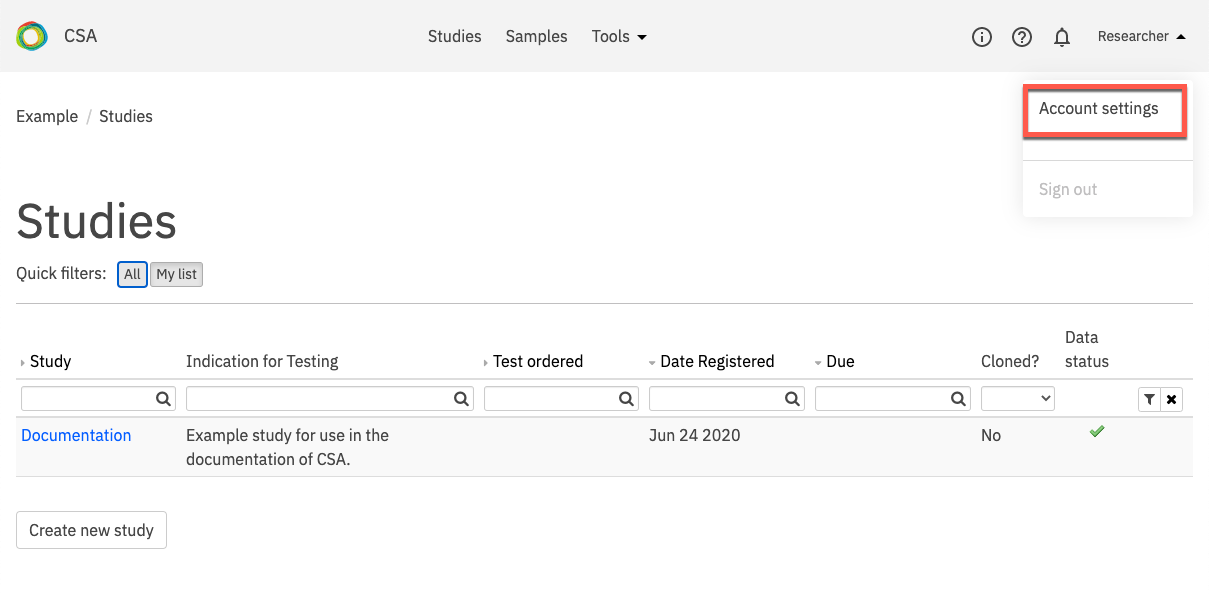
You can update your CSA account settings at any time by clicking the arrow next to your name in the top right-hand corner of any CSA page and selecting Account settings from the drop-down list.

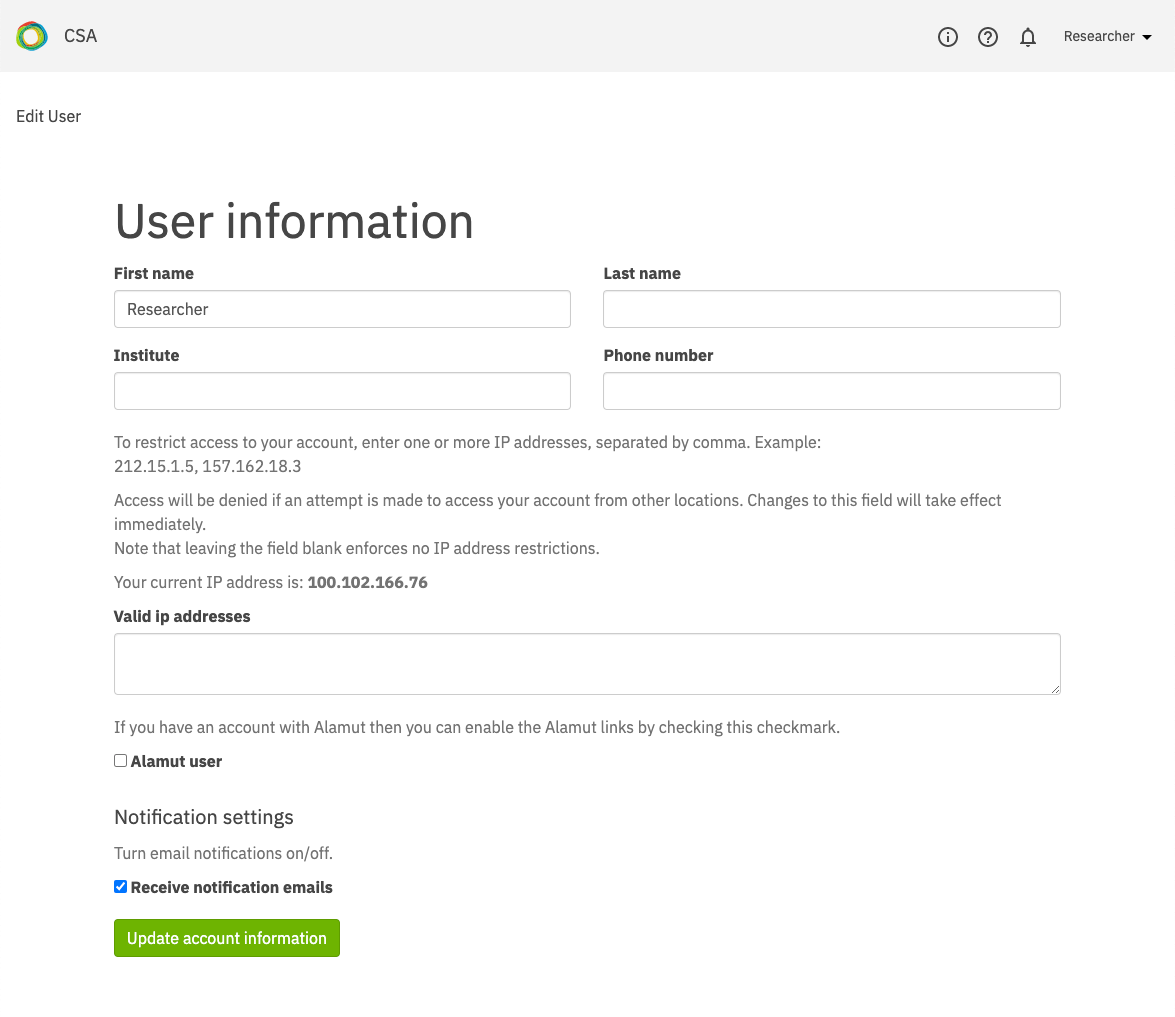
Edit the fields as desired and click Update account information to save the changes and update your account.

Configuring Alamut
Alamut users can enable the Open in Alamut feature, which provides a link to the Alamut application from a selected variant in the Advanced report of a selected study.
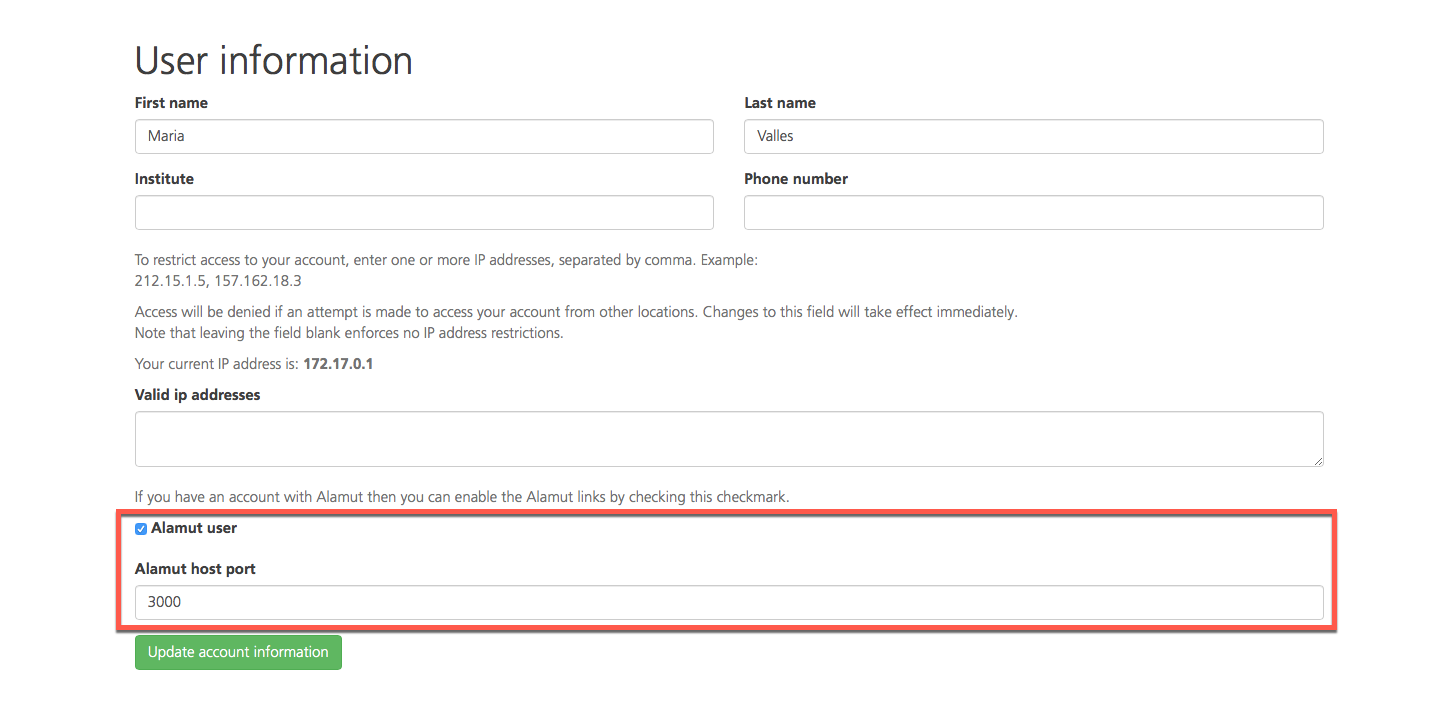
To enable the feature, select the Alamut user checkbox in the User Information dialog.
After the checkbox is selected, the Alamut host port field becomes available to edit. This is automatically set to “3000”, which is the default Alamut installation port. If a different port was selected during installation of the Alamut application, enter that port here.

Click Update account information to finish. Once configured, the Open in Alamut link is visible when clicking on a selected variant in the Advanced report view.
Uploading a custom signature
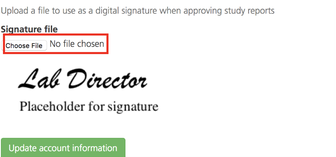
If you have the Lab Director user role, you can upload a custom signature that will be displayed on clinical reports approved by you. To upload a custom signature, open Account settings and upload a signature file from your computer. The signature file must be an image file such as JPG or PNG, and the size must be less than 1 MB.

Once uploaded, the signature will automatically appear at the bottom of reports approved by you.
Note
This option is available only for users with the Lab Director user role.