Generating a Report
To summarize the findings and conclusions of studies created in CSA, you can generate a clinical report from the Reports tab of the Study Overview page. From this tab, generated reports can also be opened, edited, and reviewed for approval.
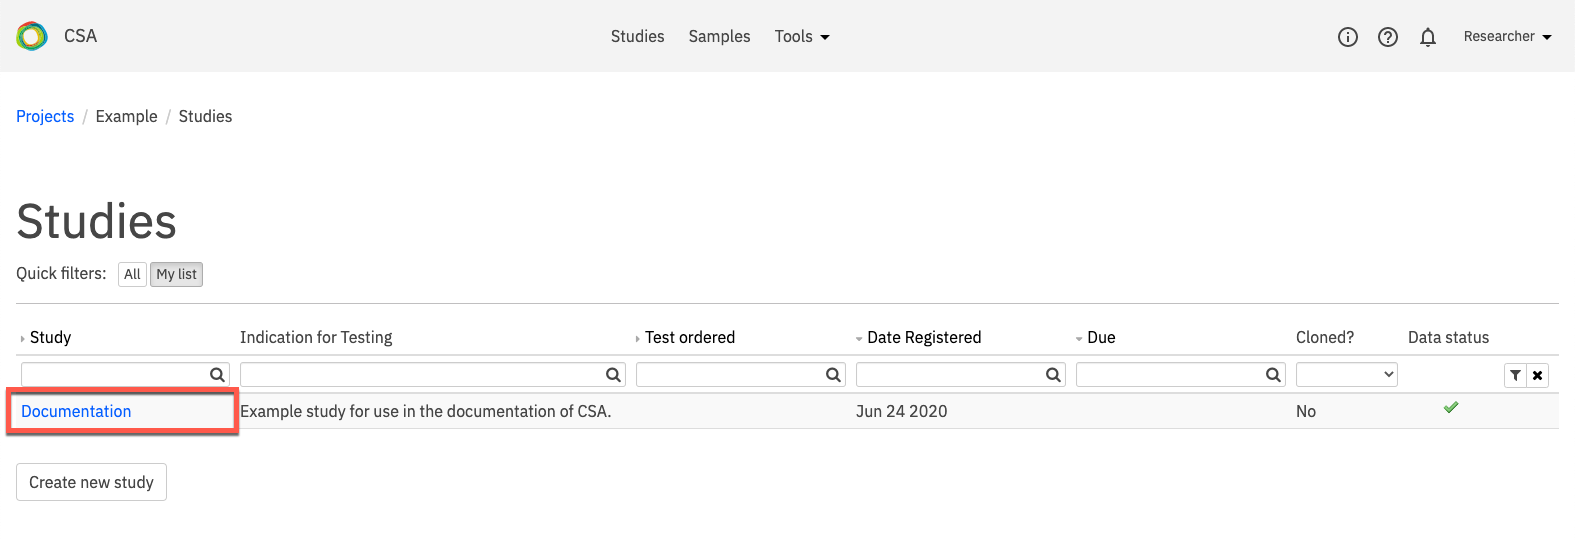
To access the Reports tab, click the Studies link in the top navigation to open the studies page. On the Studies page, select a study by clicking on the study name.
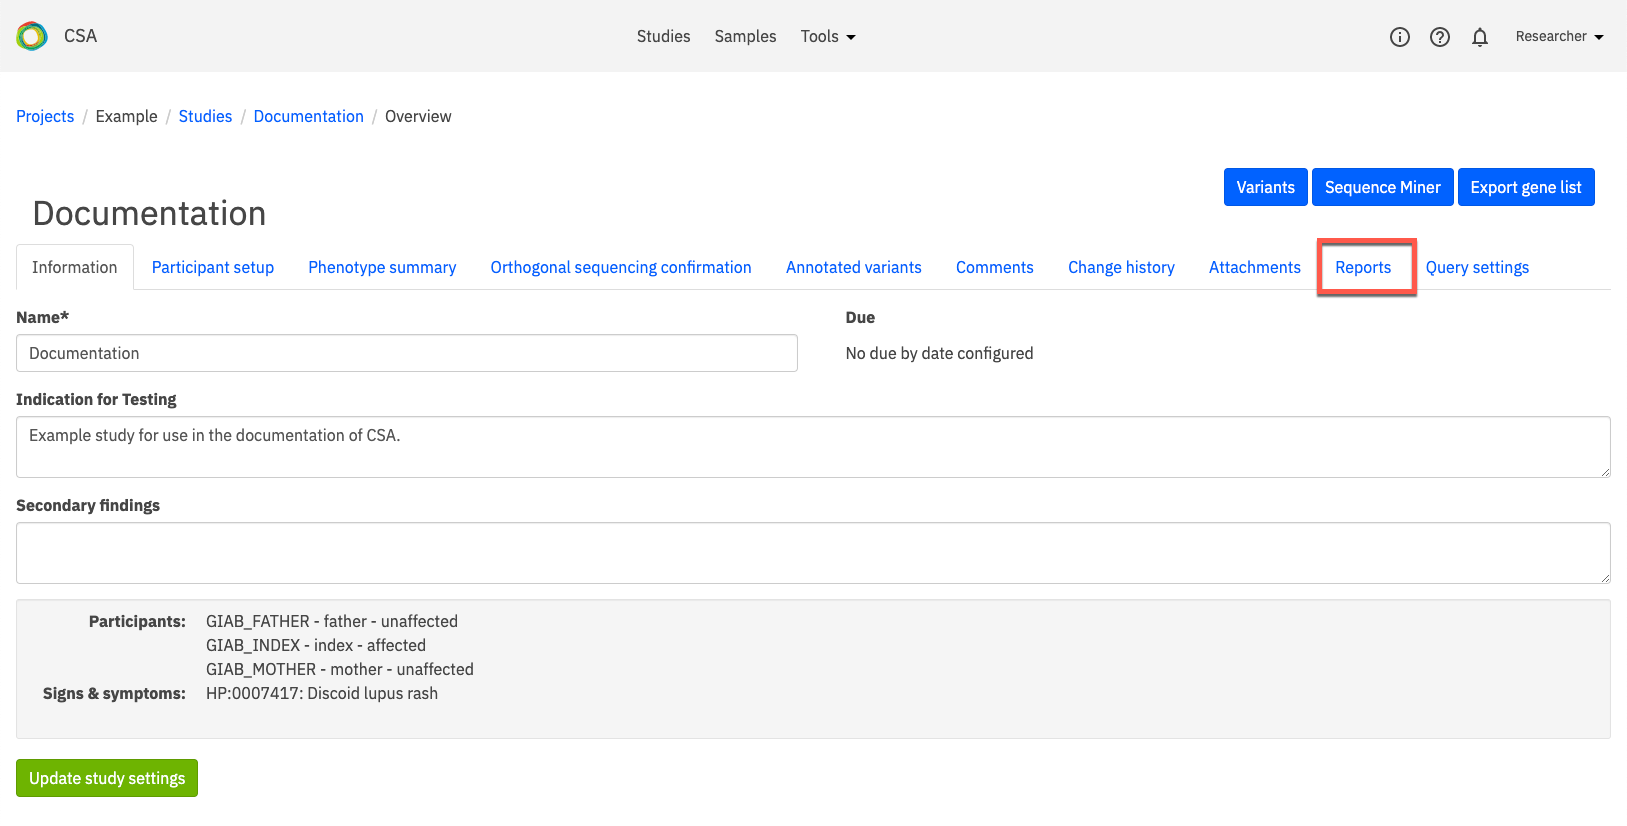
On the Study Overview page, open the Reports tab.
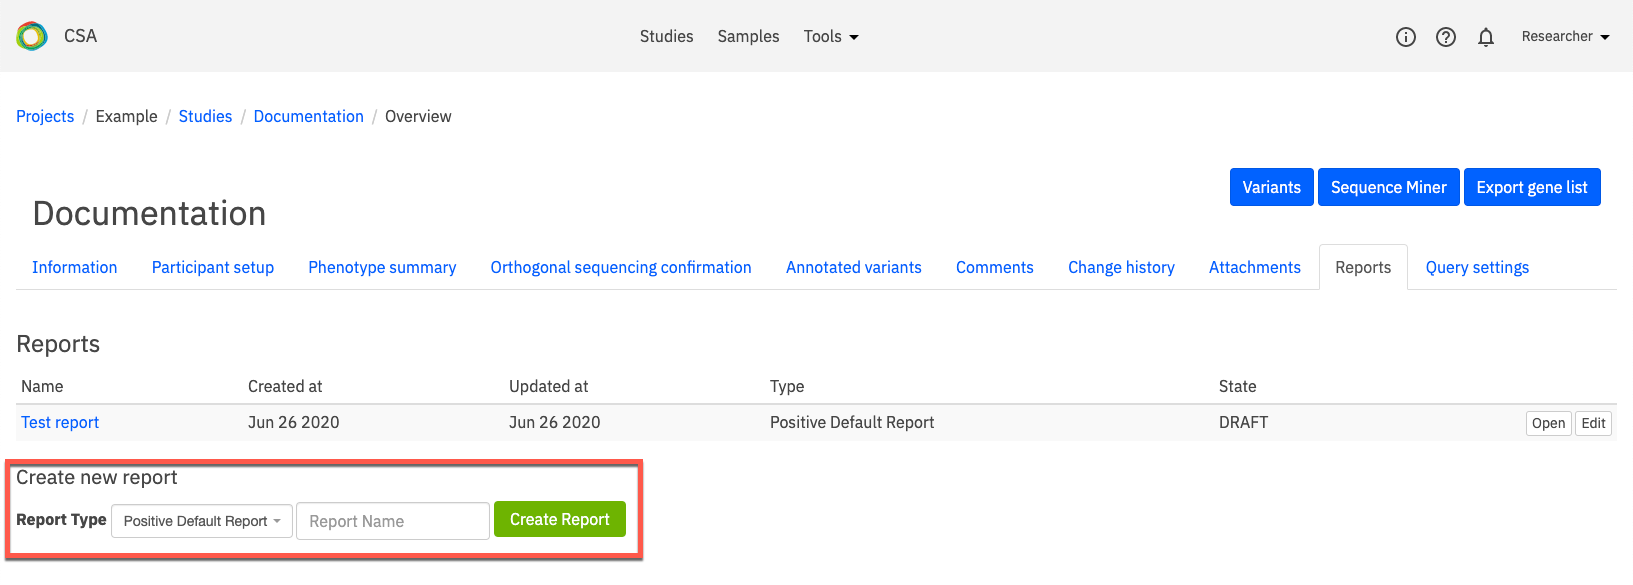
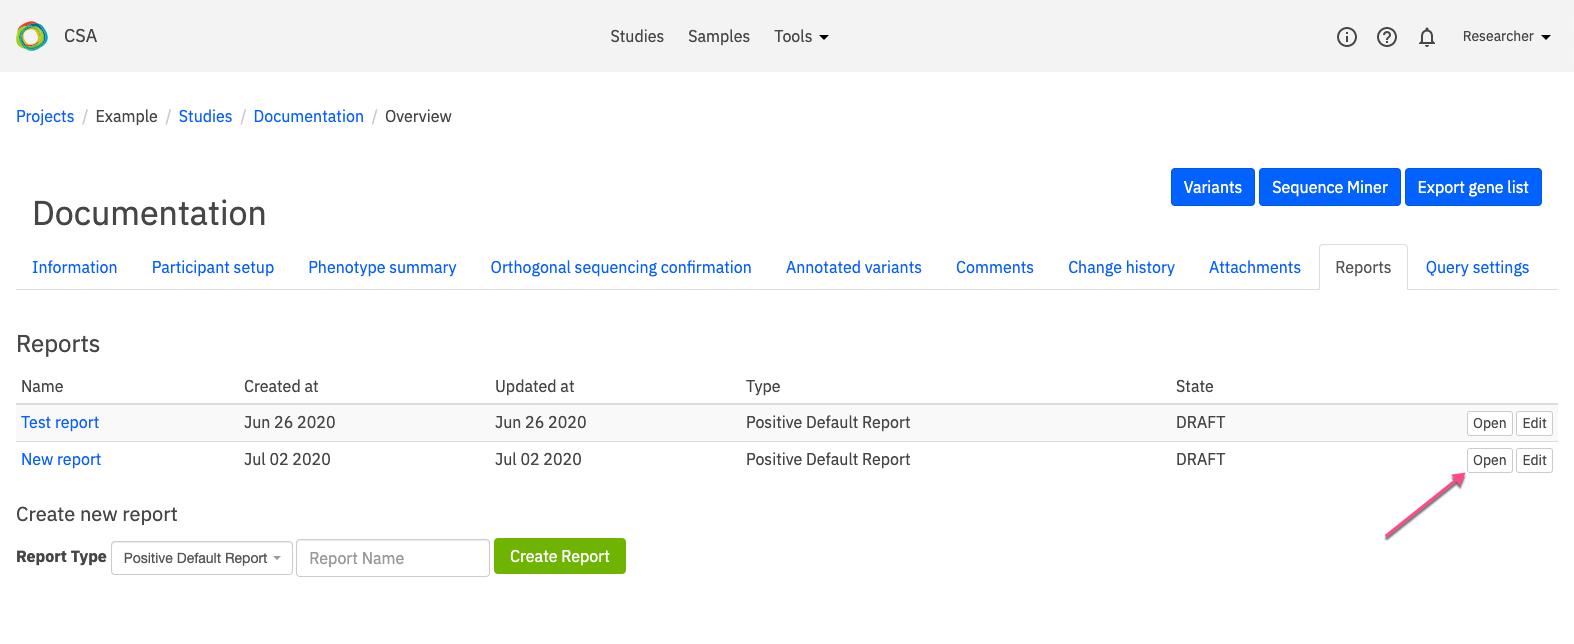
In this tab, you can view a list of all previously generated reports. In the image below, one report has been generated called Test Report. Clicking on the name of the report will open the report.
Under Create new report, select a Report Type from the drop-down list and enter a name for the report in the Report Name field. Click Create Report to open the Edit report page.
The Edit report page contains a selection of fields which are used to create a report document describing findings, interpretation, and a case summary. Some fields are automatically populated from user-defined study annotations, while others require user input to populate headers and body text in the generated report.
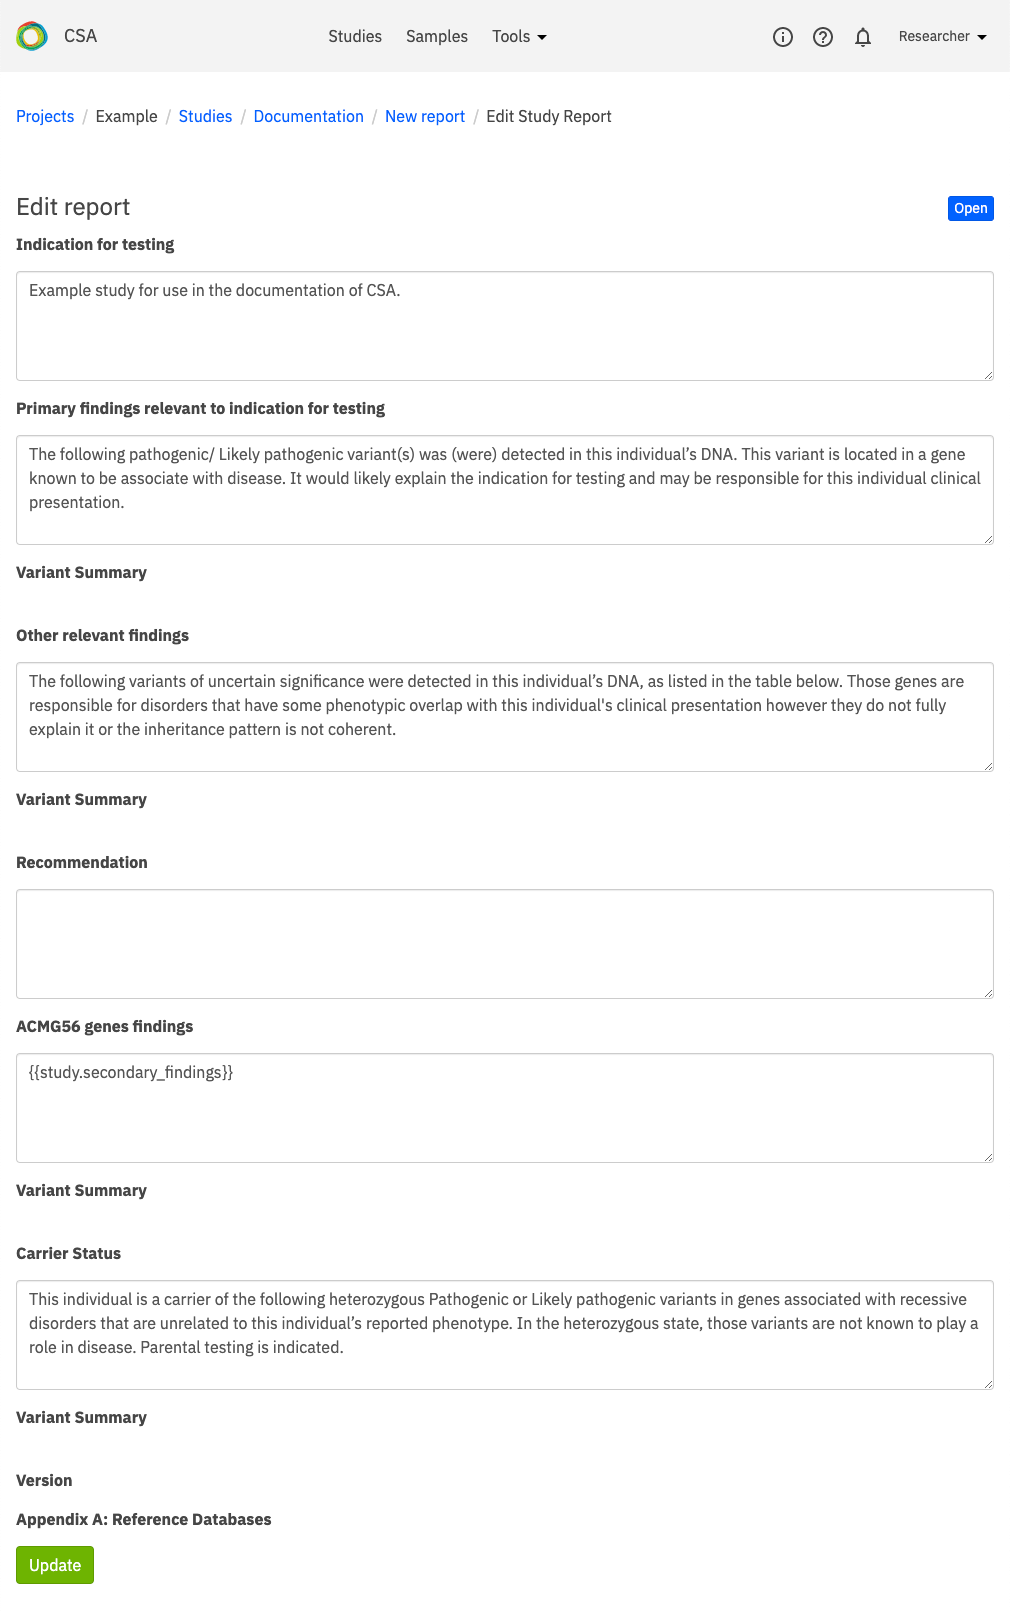
Available fields include the following:
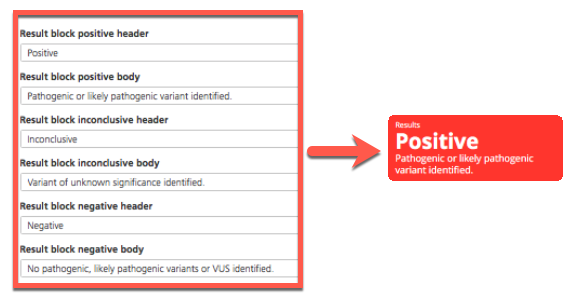
Results block - These fields define the results displayed in the report for Positive, Negative, and Inconclusive findings.
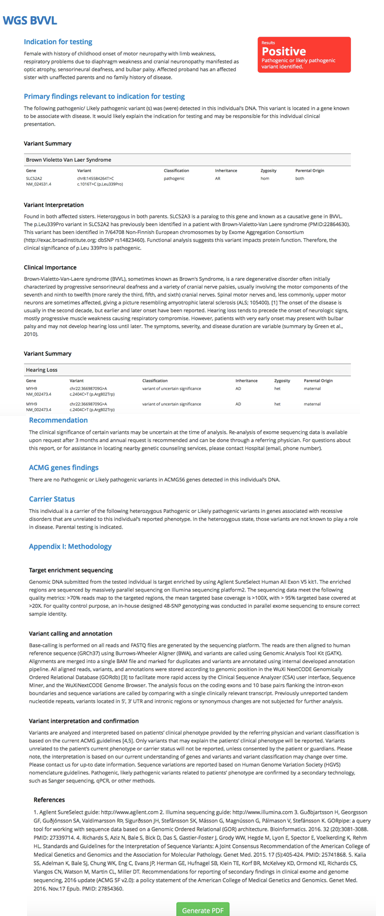
Primary findings - Body text entered in the Primary findings body field displays under the Primary finding indication for testings header in the generated report. The Variant summary and Variant interpretation fields are automatically populated based on the annotations made on the Variant curation tab of the Variant view window.


Clinical importance - Body text entered in this field populates the Clinical importance section in the generated report.

ACMG genes findings and Carrier status - Header and body text entered in these fields populate the corresponding sections of the generated report.

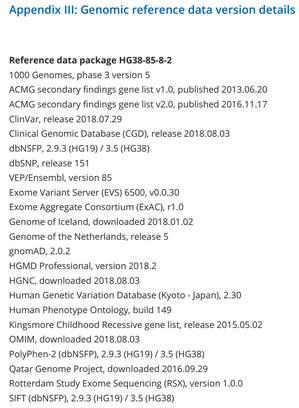
Reference data package - An appendix is automatically added to the report which is linked to the reference data that was used to generate the report.
Note
Fields that are left blank are omitted from the generated report.
After editing the desired fields, click Update at the bottom of the page to integrate the changes and return to the Reports tab on the Study Overview, where the report is now available for selection in the Reports list.

To view the report, open the Reports tab and click Open on the right-hand side of the selected row.
A selected report can also be opened from the Edit report page by clicking Open in the top right-hand corner of the page.

Viewing reports
To view a list of all PDFs generated from a selected report, click View generated PDFs to open the Reports generated from study report page.

On the Reports generated from study report page, open a selected PDF by clicking Open.

Approving reports
If you have the Lab Director user role, you can approve clinical reports generated by users in your project.
To approve a report, open the Reports tab and click Approve on the right-hand side of the selected row. If you have uploaded custom signature, the signature will automatically be added to the report.

An approved PDF of the generated report can now be opened in the Reports list by clicking Open approved pdf.
