Clinical Workflow Quick Start
This quick-start guide walks through a basic clinical workflow in CSA, which includes the following major steps:
Initial case review and variant interpretation by a user with the Variant Scientist user role.
Case, variant, and clinical report review and approval by a user with the Lab Director user role.
Initial case review and variant interpretation
With a Variant Scientist user account, log in to CSA with your WXNC user credentials and complete the following steps.

Step 1: Open a study for interpretation
On the Projects page, select the project of interest. The Studies page will open.
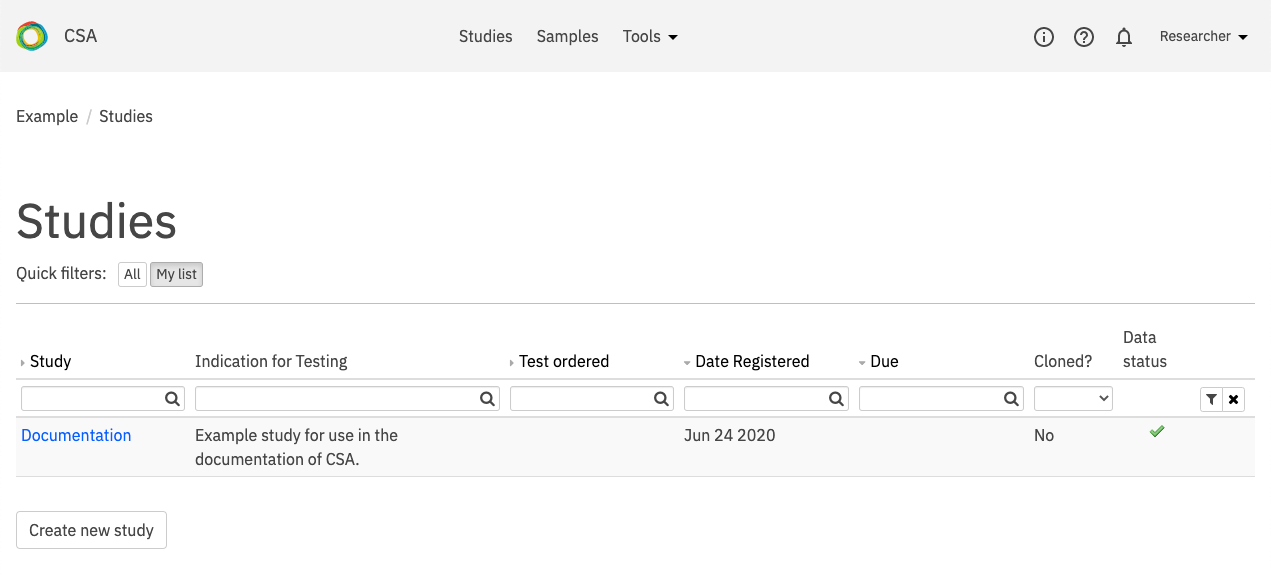
On the Studies page, select a study for interpretation. Use the Quick filters at the top of the page to filter studies that require review and/or are assigned to you.
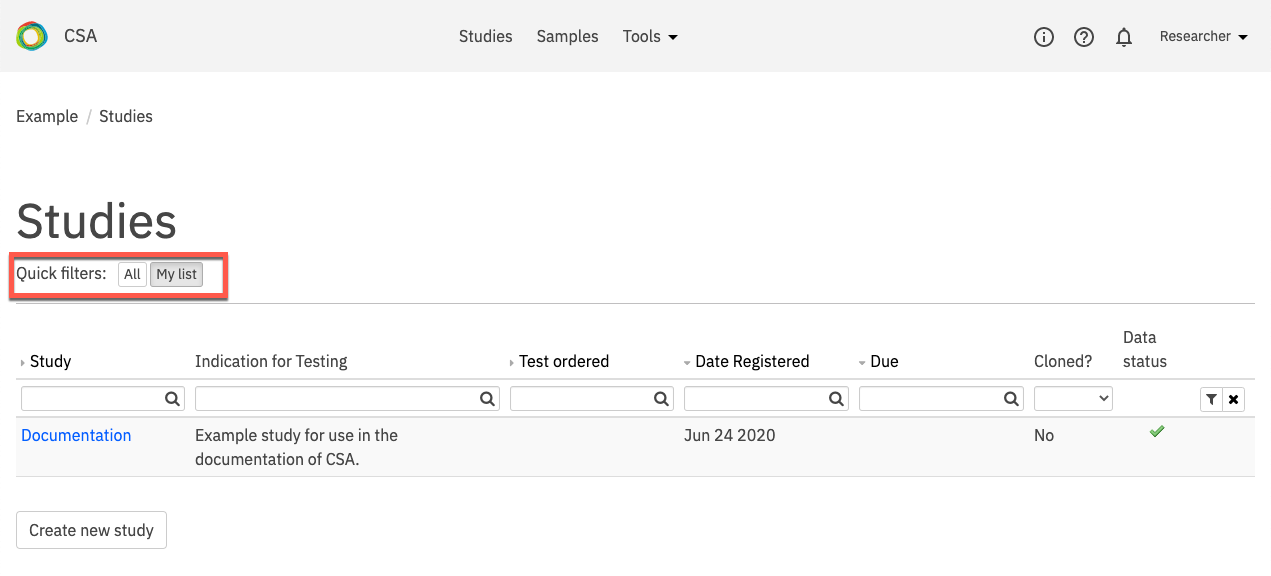
See also: Managing Studies
Step 2: Review basic study information
On the Study Overview page of the selected study, multiple tabs display study-specific information, including the following:
Information (opens by default) - Review the summary of basic study information. At the bottom of the page, review the case description and participants registered to the study, as well as the relationship and affected status. Set the Case status field to the appropriate workflow state (such as “Variant review”) and click Assign to me to make yourself the assigned user. Click Update study settings at the bottom of the page to save any changes.
Phenotype summary - Open this tab to check the list of phenotypes registered to the index case in the study.
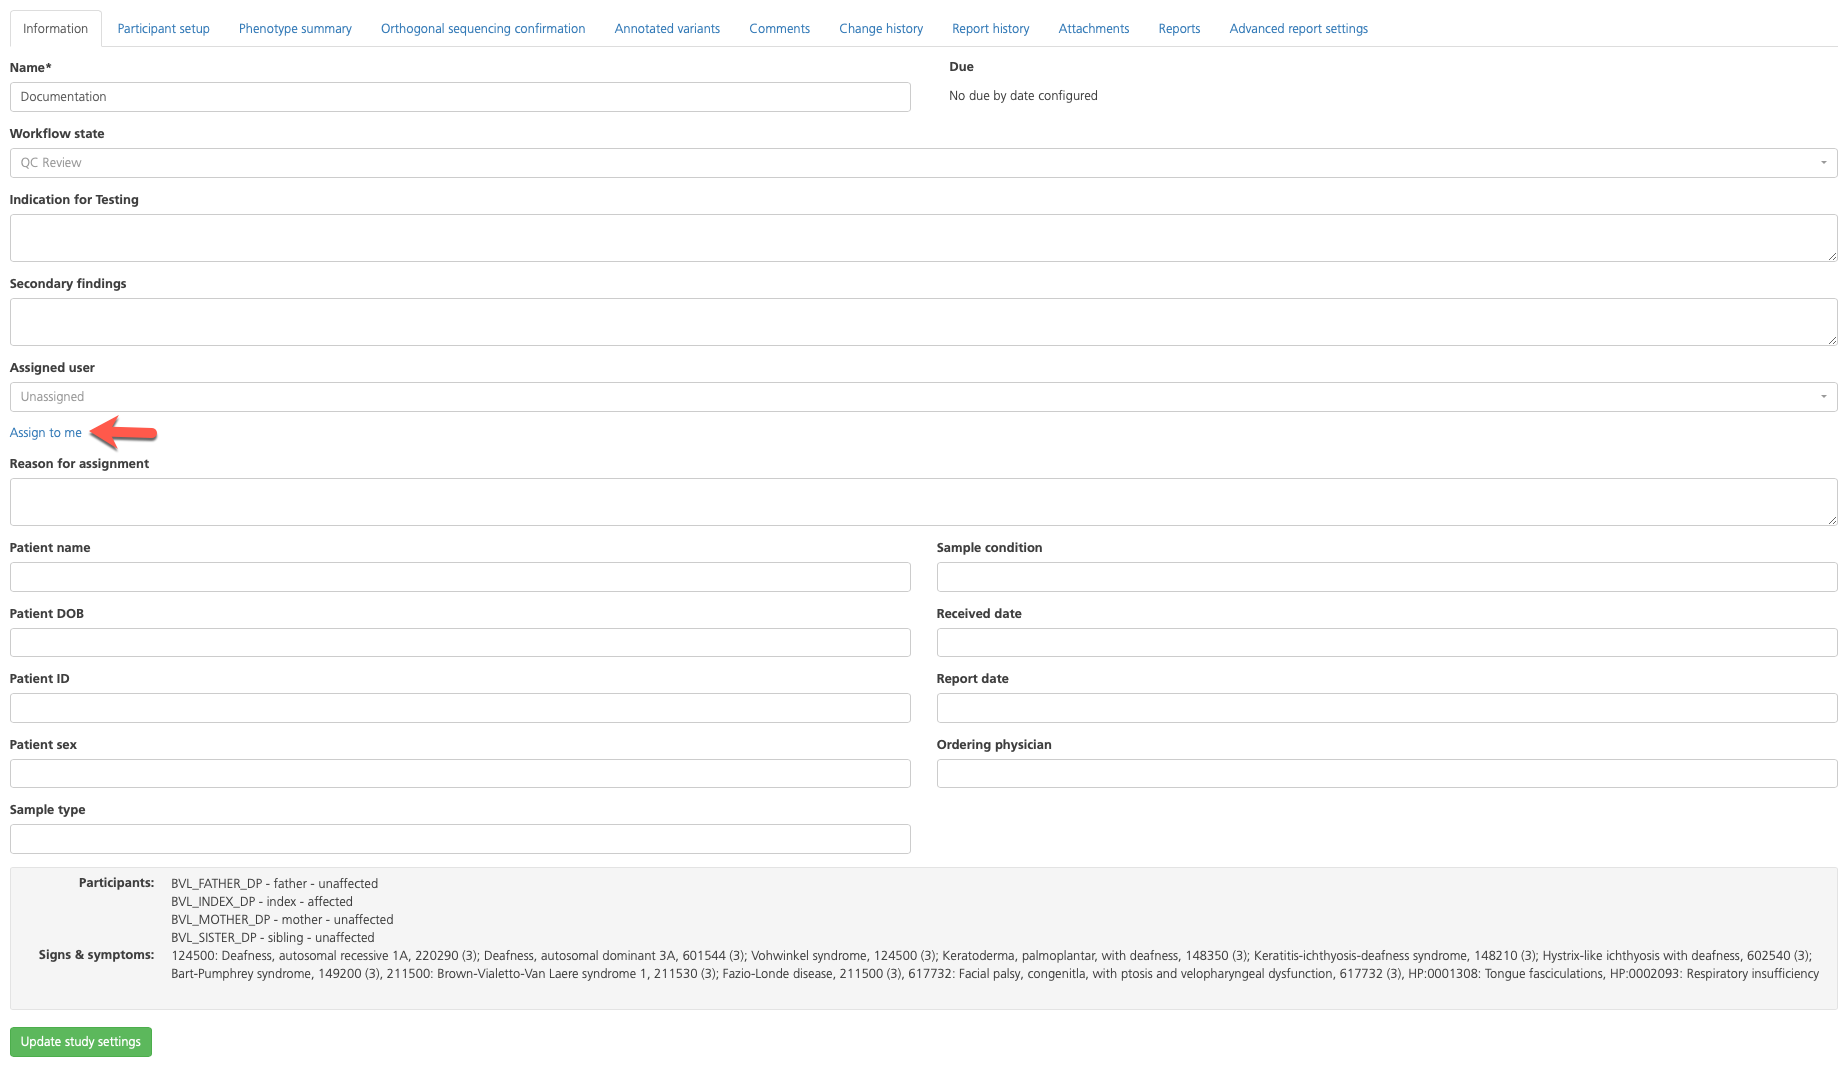
See also: Study Overview
Step 3: Review the Advanced report
To review variant listings and identify variants of interest, click the Variants link at the top of the page.
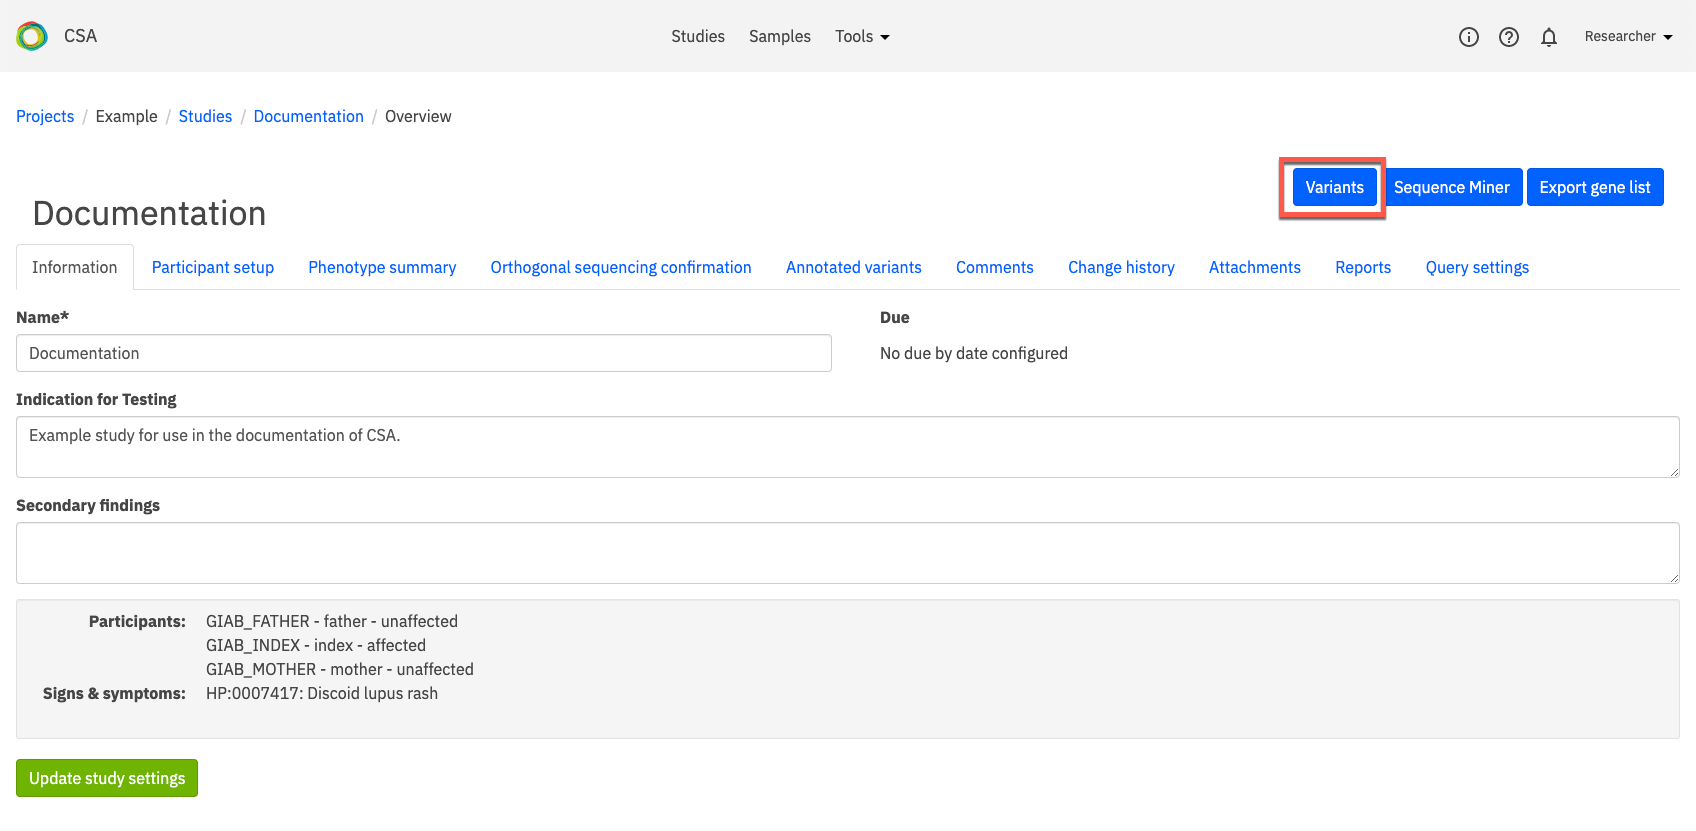
Variant listings are filtered according to the parameters defined in the study’s Report settings.
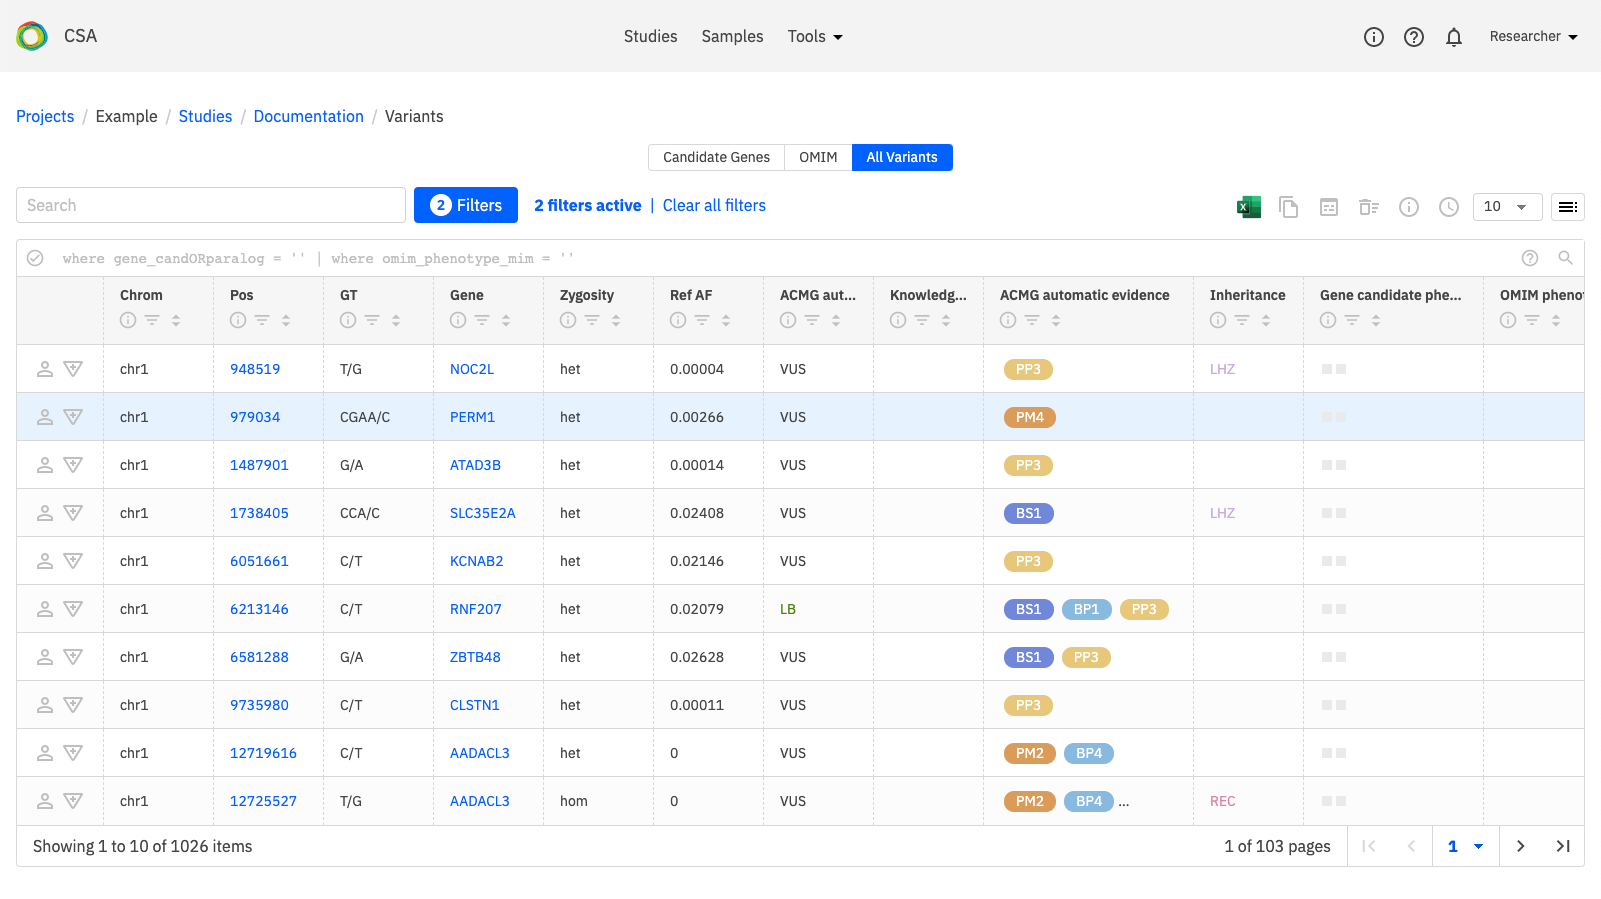
A full description of the Variants window can be found here
See also:
reportSettings
Step 4: Initiate a new variant curation
After identifying a variant of interest, open the Variant Summary window by clicking the Info icon in the leftmost column of the selected row.
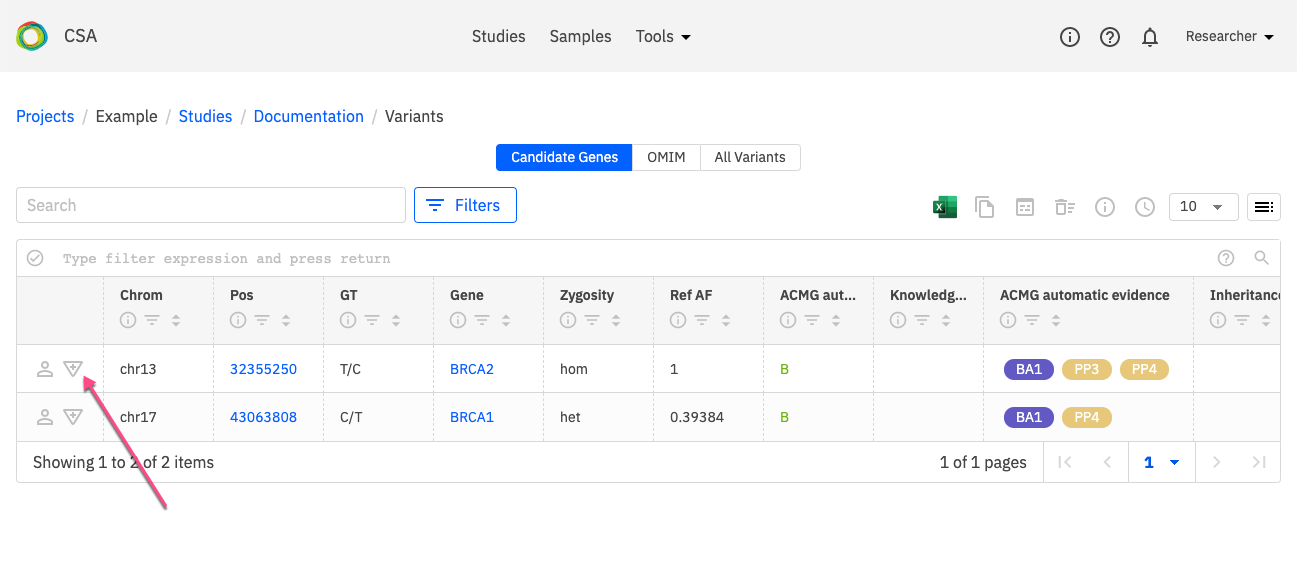
In the Variant information panel, open the Variant disease curation drop-down menu and select New variant disease curation.

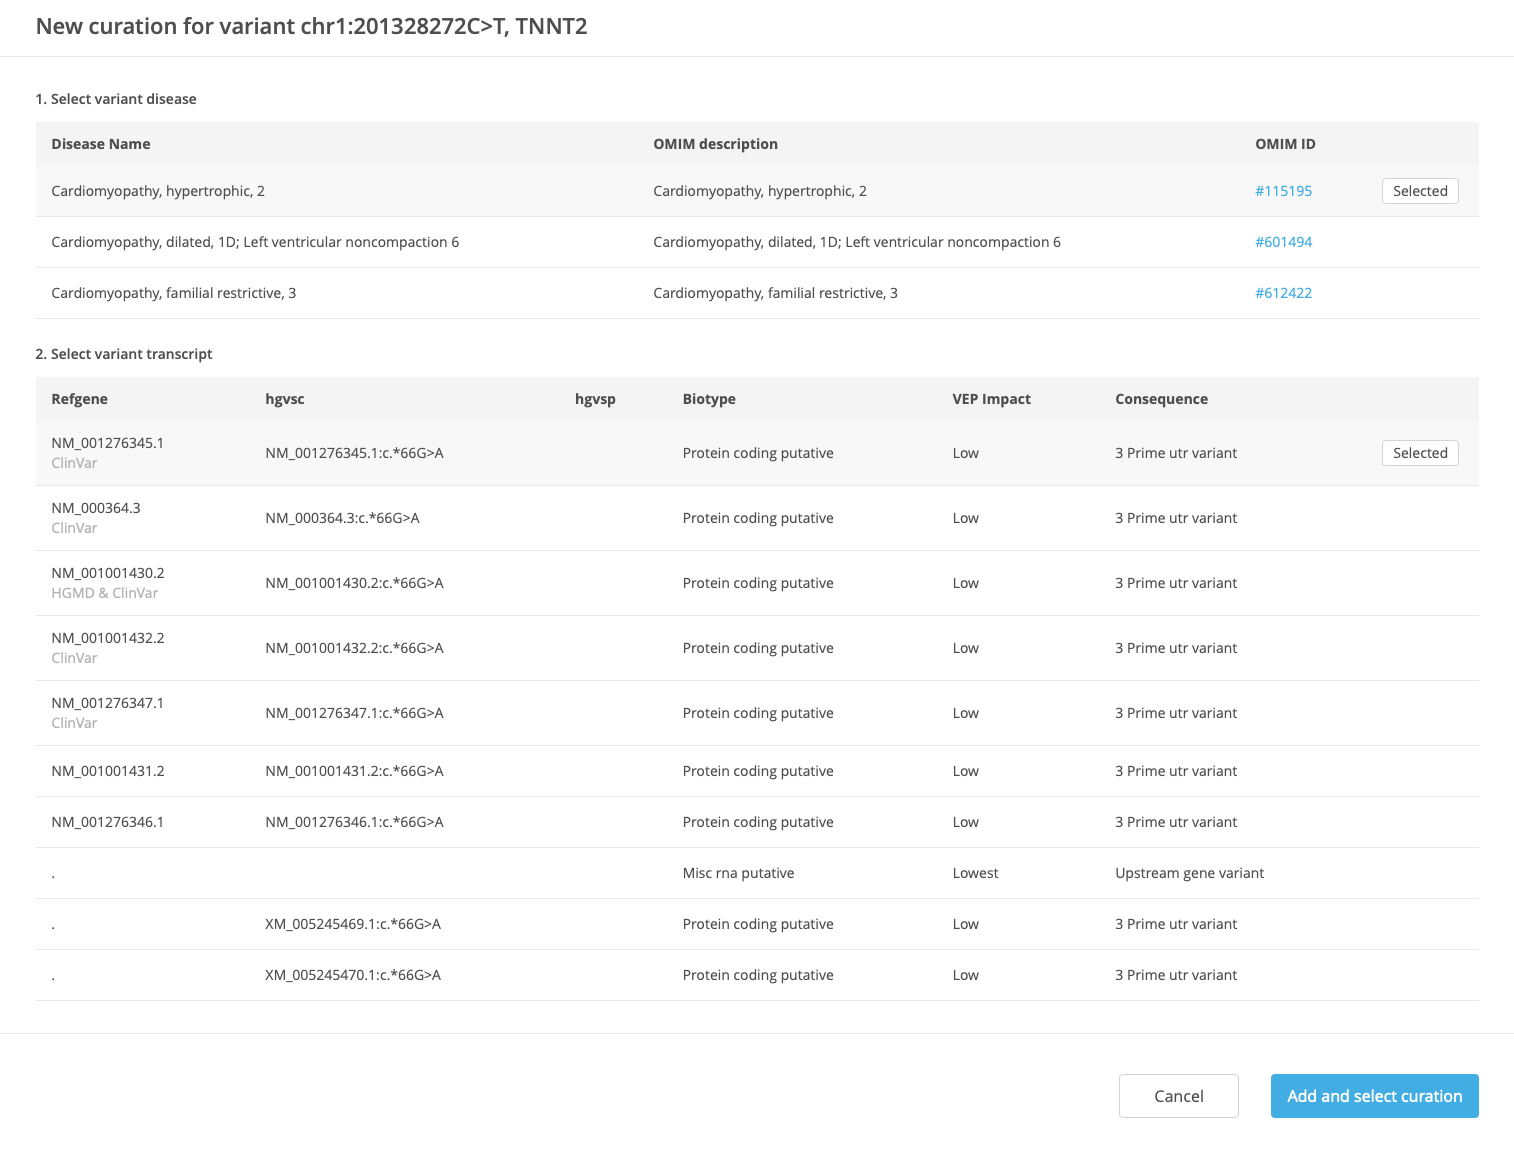
In the New curation window, select the disease and transcript (the preferred disease and transcript are selected by default) and click Add and select curation.
At the top of the Variant Curation window, set the Review status to “Draft”. If applicable, select the mode of inheritance from the Select inheritance menu.

See also: Variant Curation
Step 5: Score variants according to ACMG guidelines
The lower panels of the Variant Curation window are focused on variant curation scoring according to ACMG guidelines.
Start by selecting an ACMG category of evidence in the left-hand panel. For each category of evidence, select available lines of evidence in the center panel. In the right-hand panel, the Resources section displays relevant resources collected for ease of scoring. Use the checkboxes in the left-hand column to keep track of completed categories of evidence.
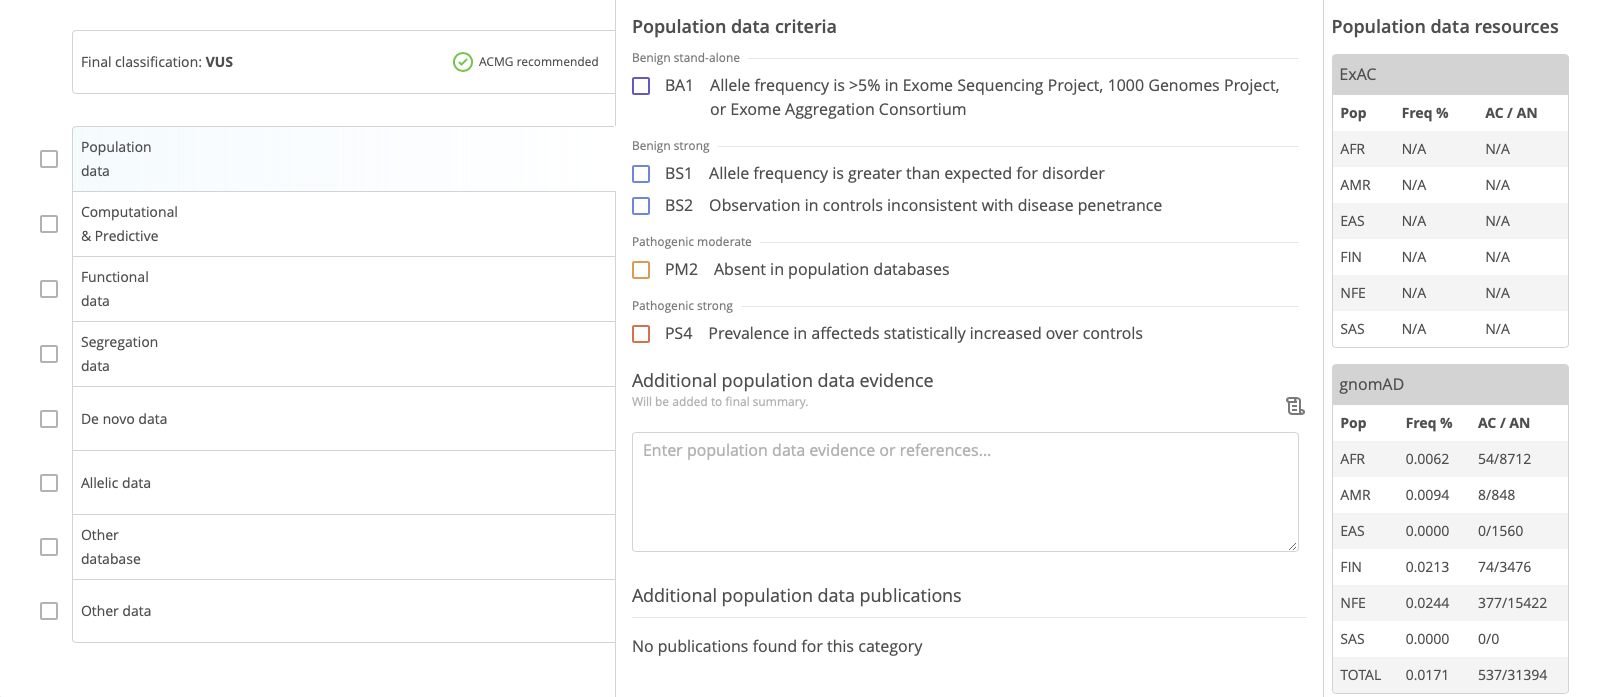
If appropriate, custom weights can be applied to each line of evidence. In addition, publications can be selected and attached from the PubMed database.
As scoring is applied for each line of evidence, the variant classification is updated in the Final Classification field at the top of the scoring section. Click on the field to open the Final variant classification in the center panel and select a custom classification and/or enter a conclusion statement or notes for each category of evidence.
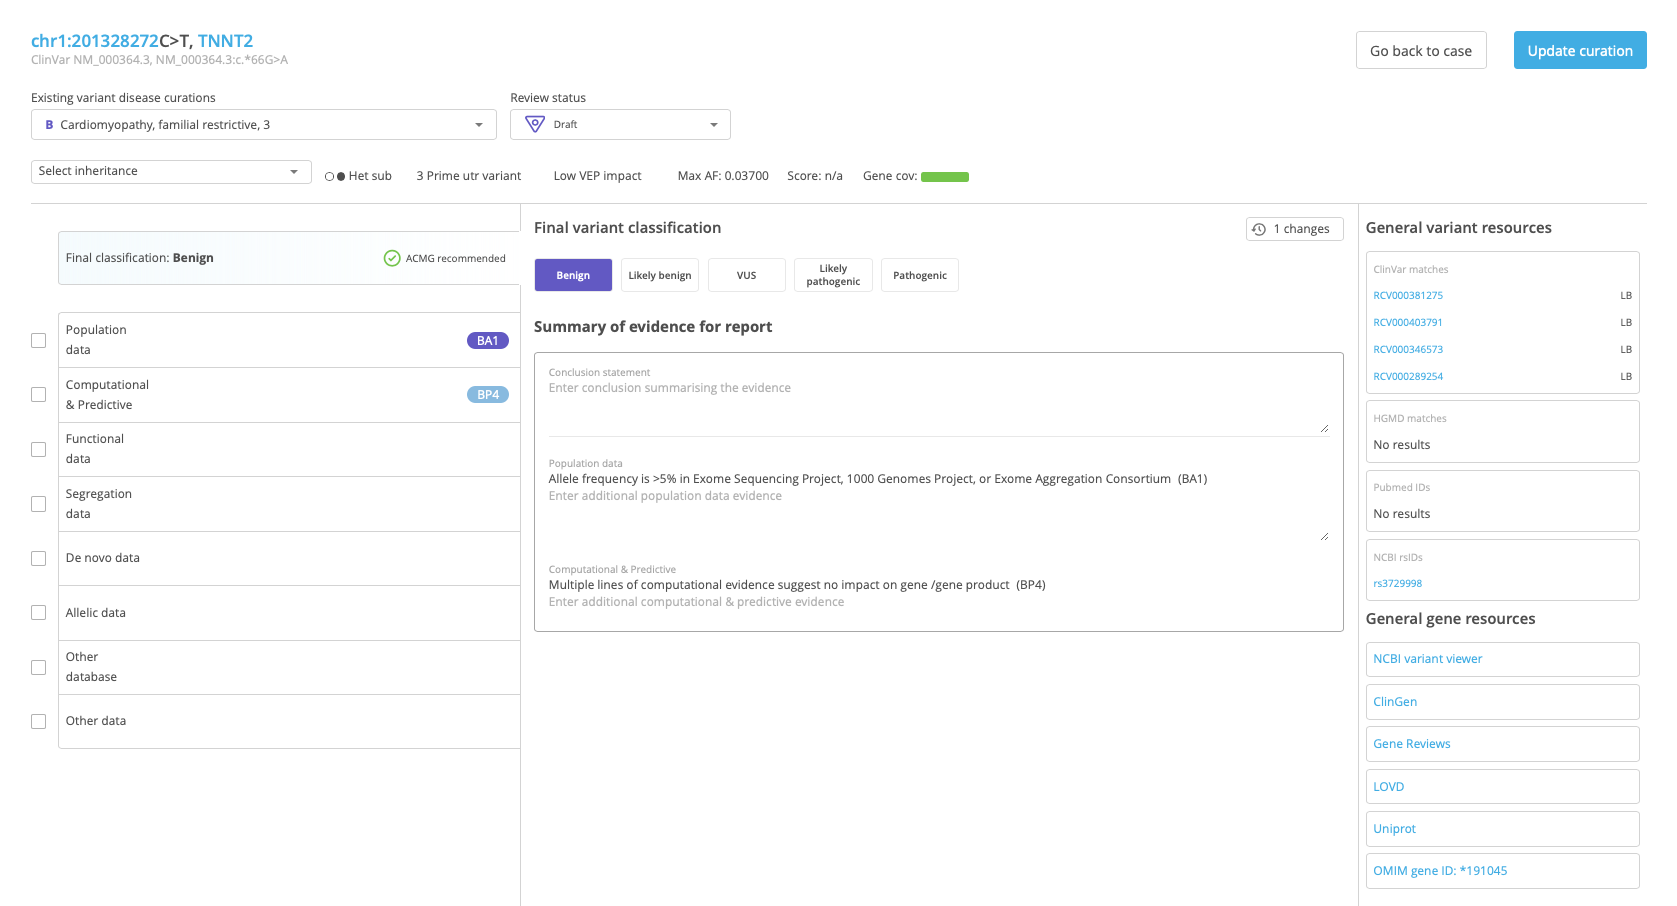
When finished, click Update curation at the top of the page to save the curation and return to the Variant Summary window.
See also: Variant Curation
Step 6: Update the Variant Summary to complete sample-level information
In the Variant Summary window, select the Variant disease curation in the drop-down menu.
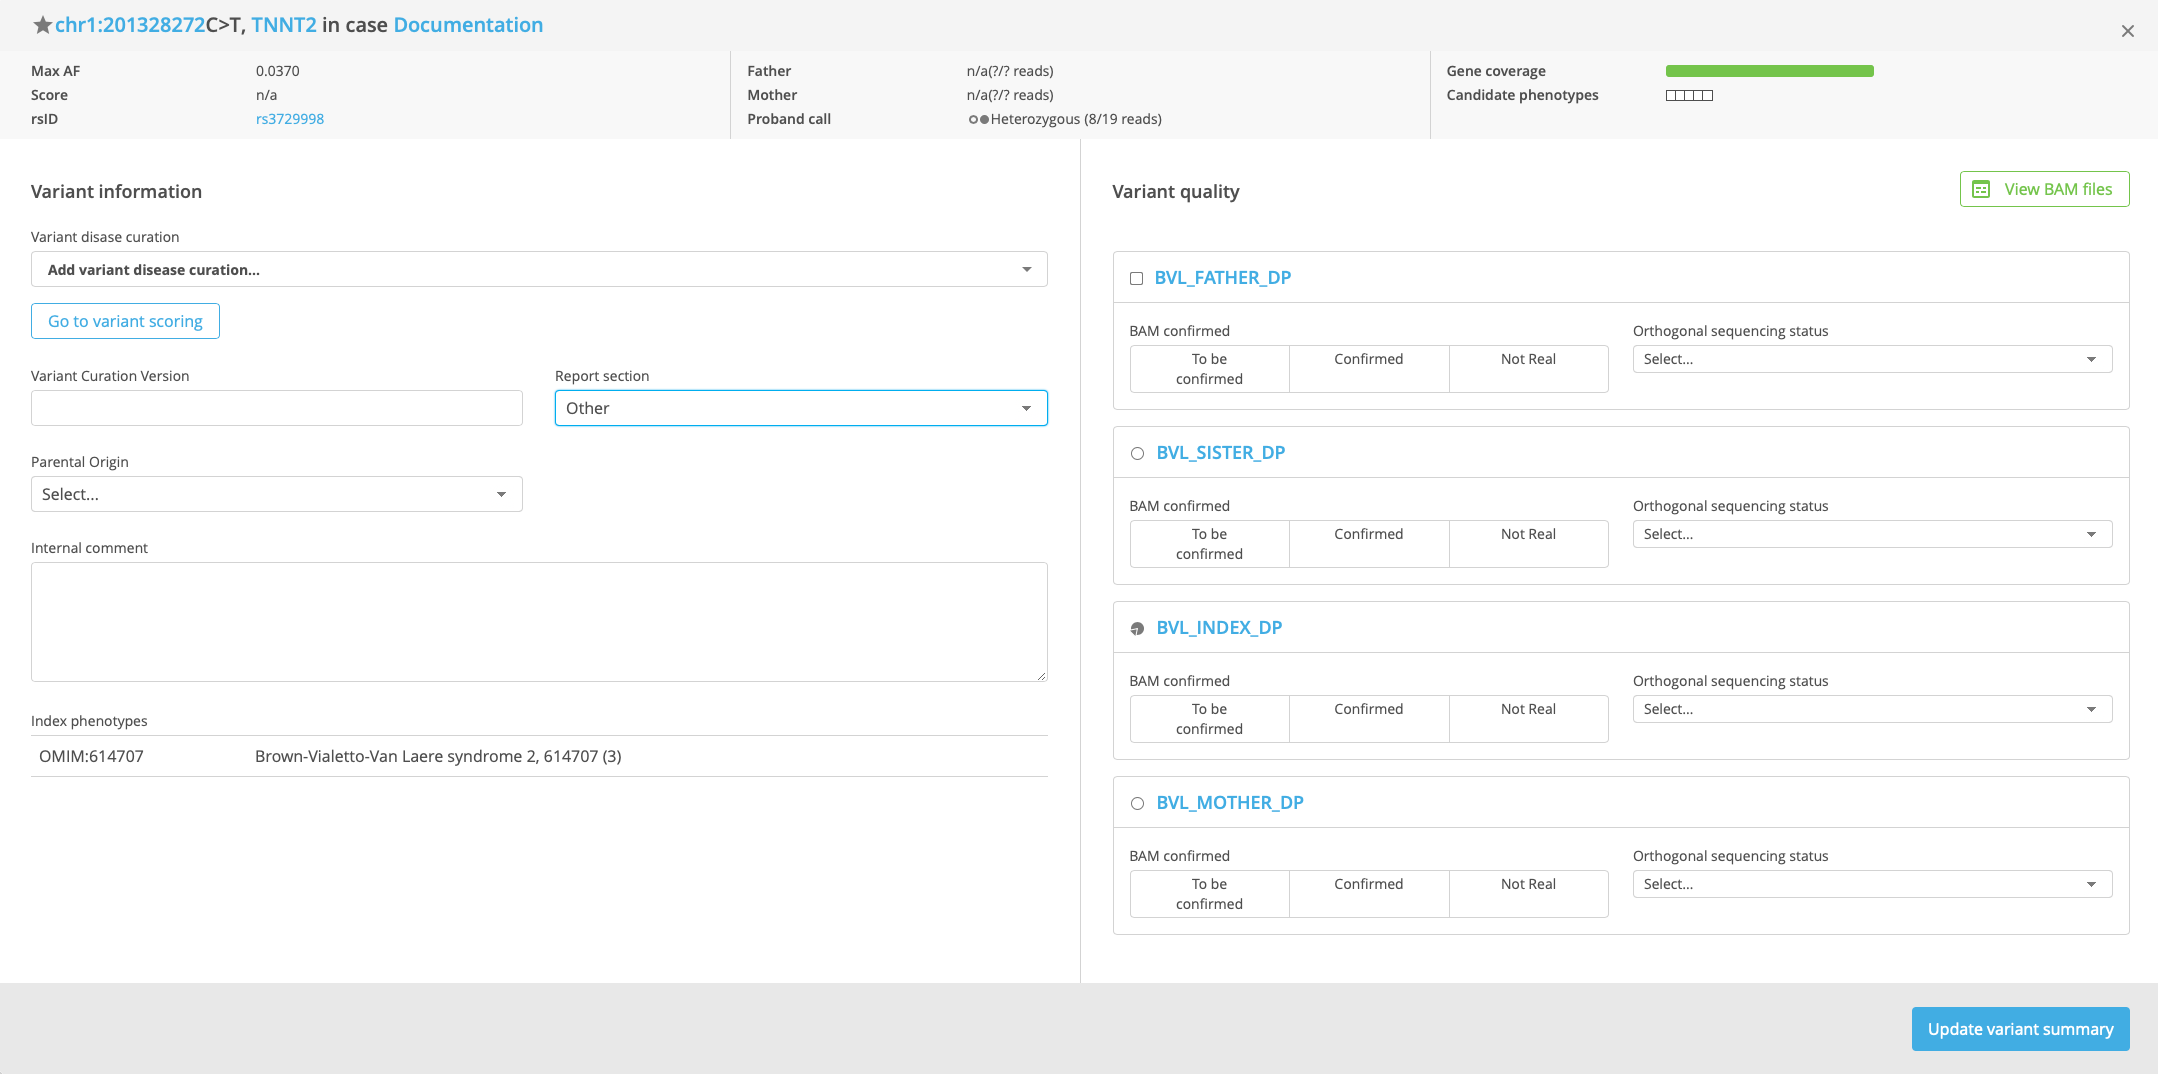
Optional: In the Variant quality panel on the right-hand side, select the appropriate values in the BAM confirmed and Orthogonal sequencing status fields for each sample.
Optional: Select the Report section where the variant information should appear in the clinical report.
Optional: Select Parental origin and Genomic origin and add internal notes in the Internal comment field.
Click Update variant summary to save the summary. A message is displayed if the update was successful.
Note
Make sure the update is successful before closing the Variant Summary window.
See also: Editing the Variant Summary
Step 7: Review additional variants for the case
Close the Variant Summary window to return to the variant listing. Repeat steps 4-6 for each additional variant of interest identified and selected in the Advanced report variant listings.
Step 8: Generate a report
To generate the clinical report, return to the Study Overview page by clicking the study name in the breadcrumb link at the top of the page.
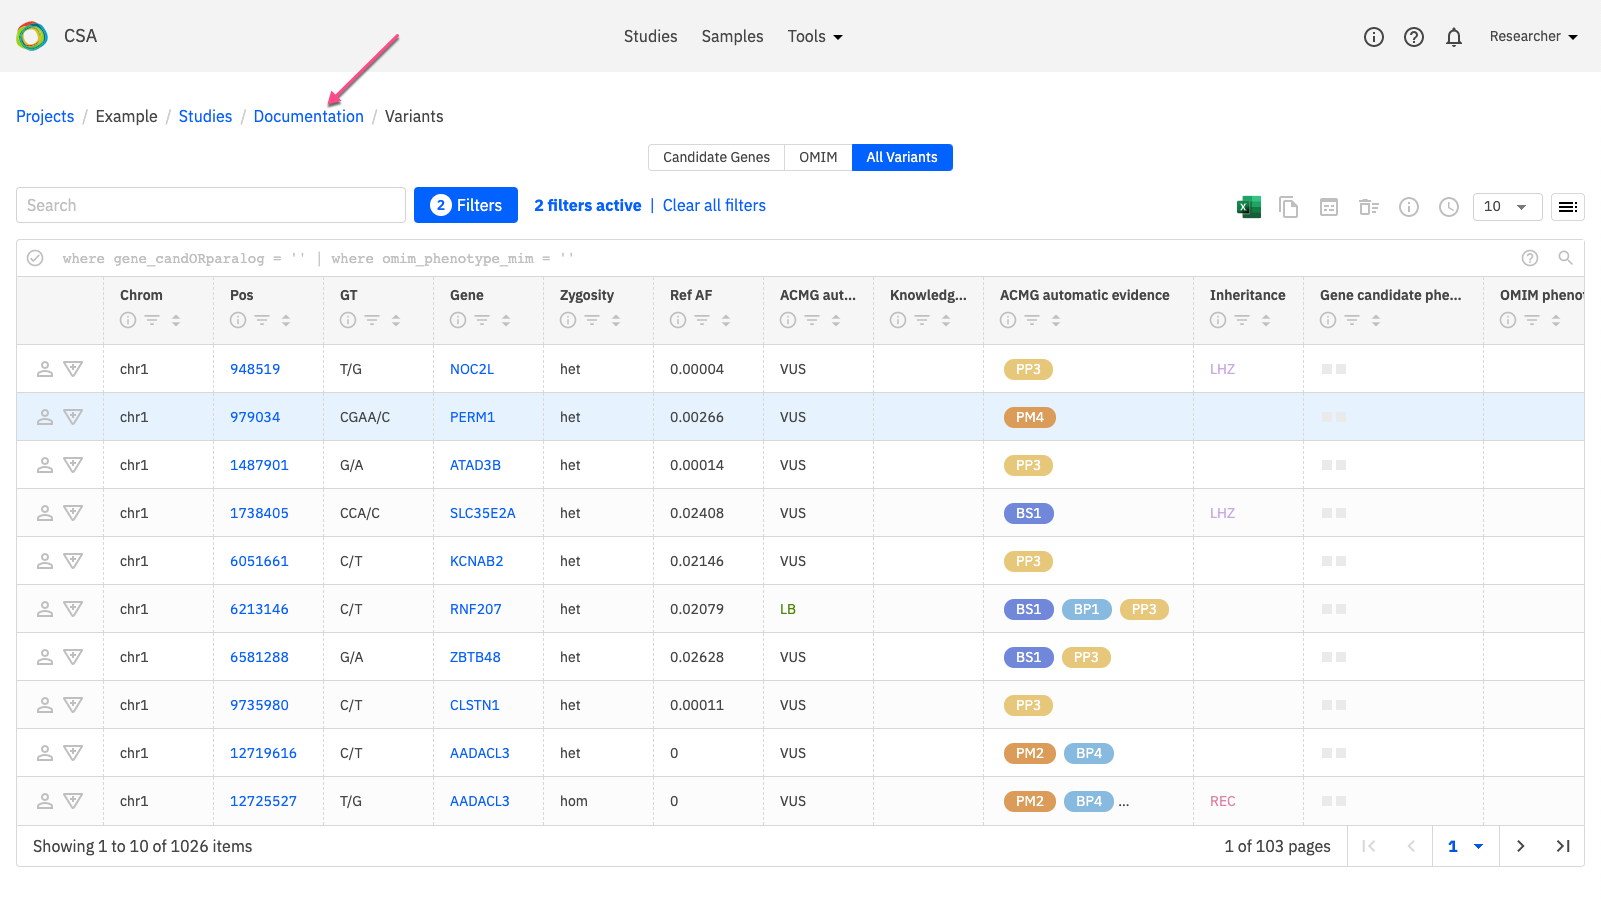
On the Study Overview page, open the Reports tab. Under Create new report, select a Report Type, enter a name for the report, and click Create report.
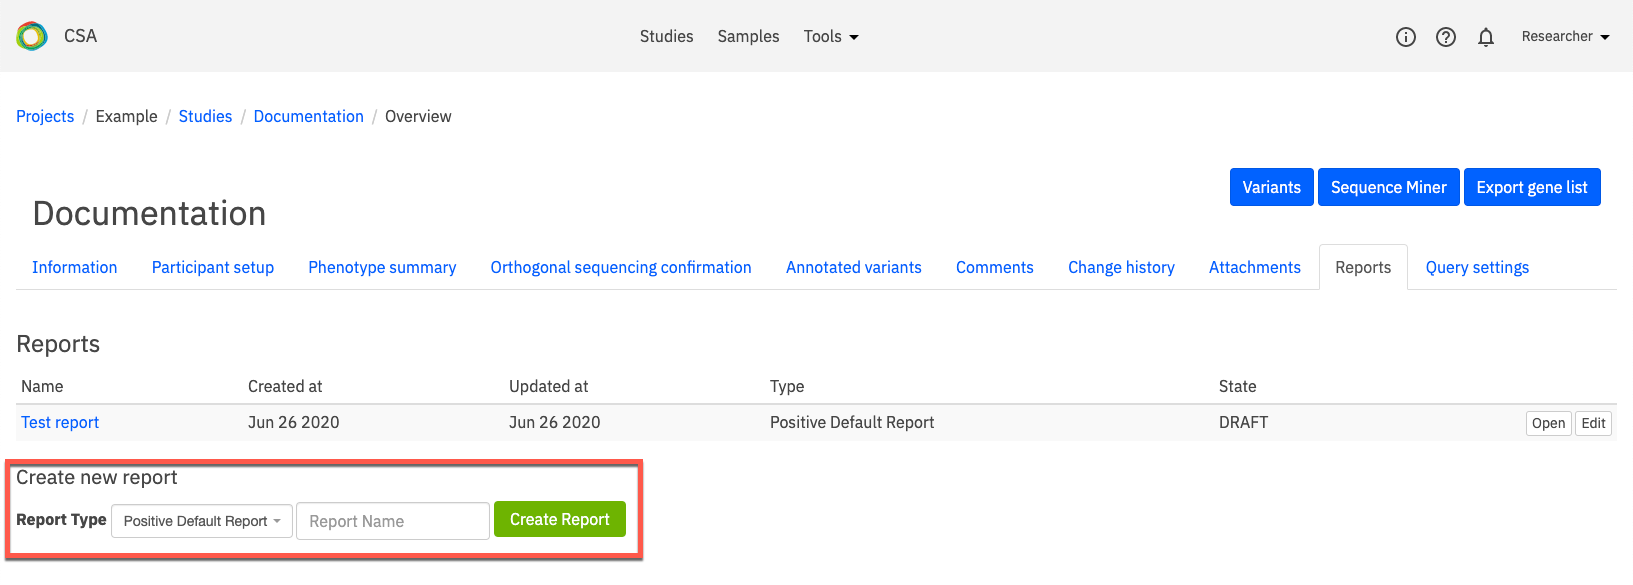
Once generated, the new report appears in the Reports list. Click Open or Edit on the right-hand side of the row to preview or edit the report draft.
See also: Generating a Report
Step 9: Prepare the case for review
On the Study information tab, set the Case status field to the appropriate workflow state (such as “Report review”). Set the Assigned user field to “Unassigned” to allow the reviewer to access the study.
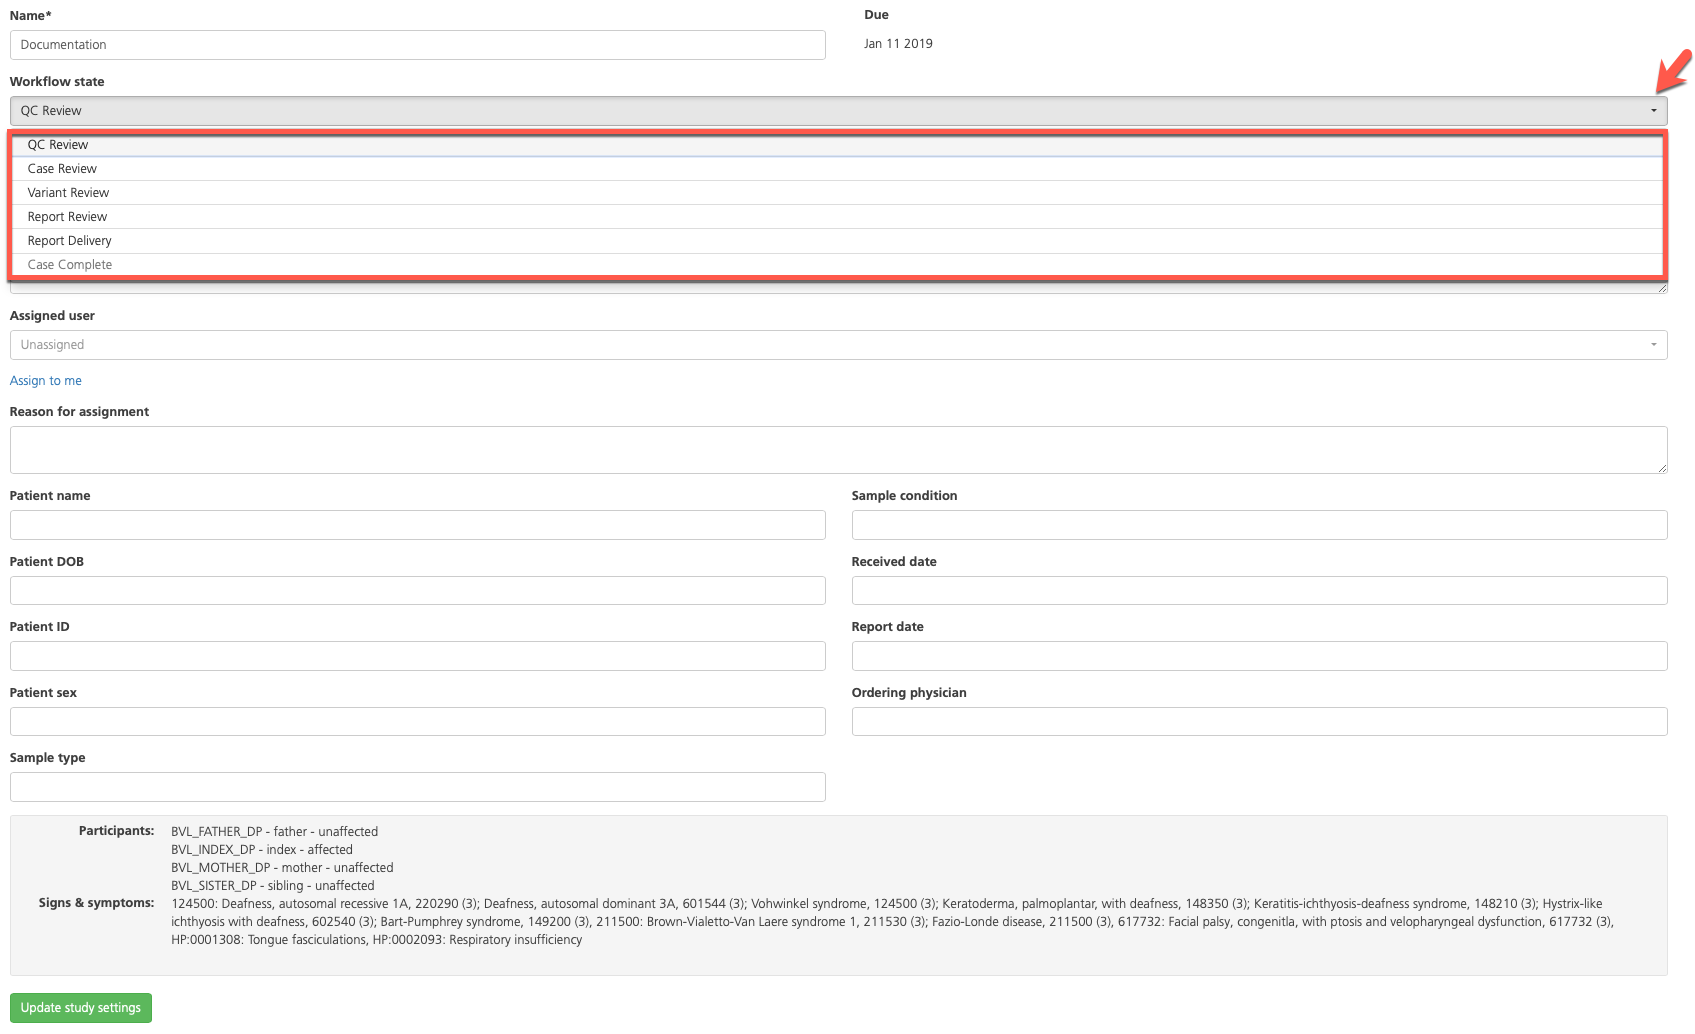
This step marks the end of the initial case review and variant interpretation by a user with the Variant Scientist role.
Case, variant, and clinical report review and approval
With a Lab Director user account, log in to CSA with your user credentials and complete the following steps.

Step 1: Import a Lab Director signature
If you didn’t already do so when setting up your Lab Director user account, upload a custom signature that will be automatically added to clinical reports that are approved and locked by you.
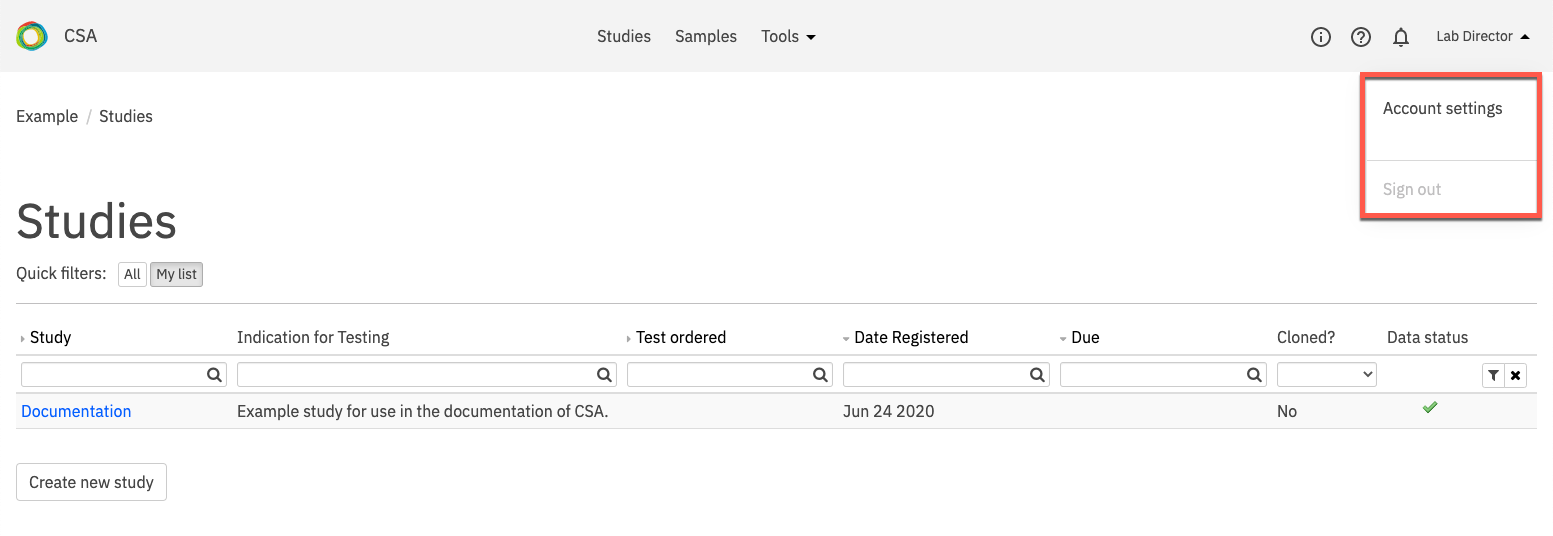
After selecting the project of interest, click on your username at the top of the project dashboard and select Account settings.
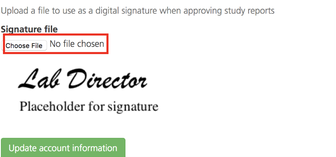
On the User information page, under Signature file, click Choose file to select and upload an image file from your computer (must be less than 1 MB).
See also: Updating account settings
Step 2: Review case information and annotated variants
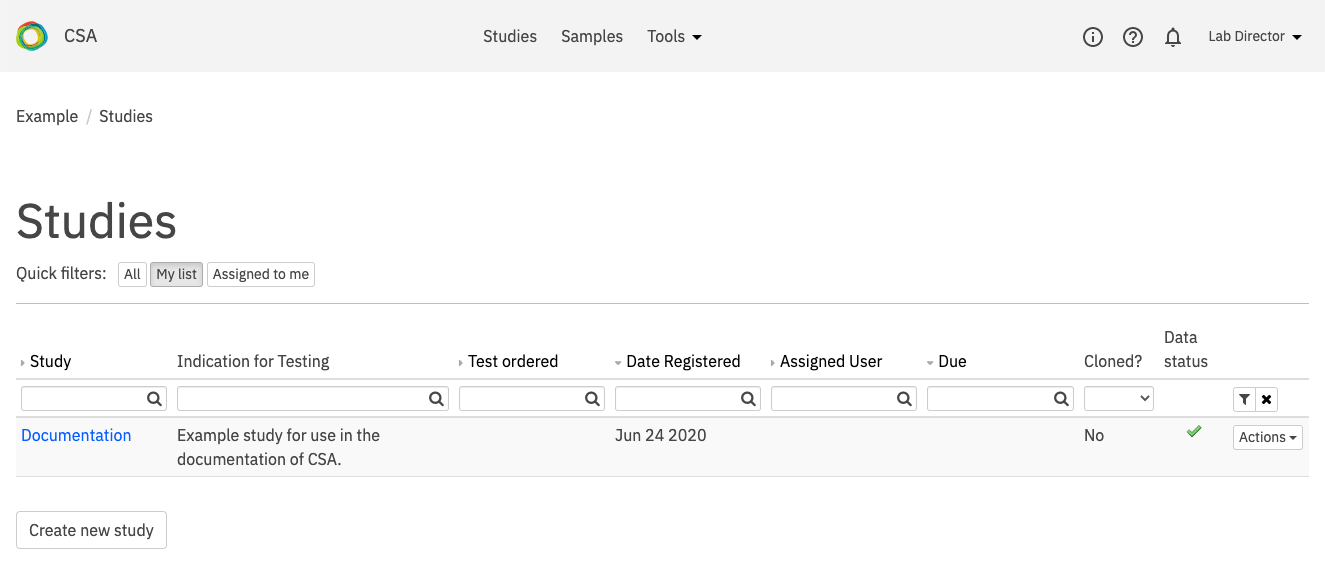
From the project dashboard, open the list of available studies by clicking the Studies link in the top navigation bar.
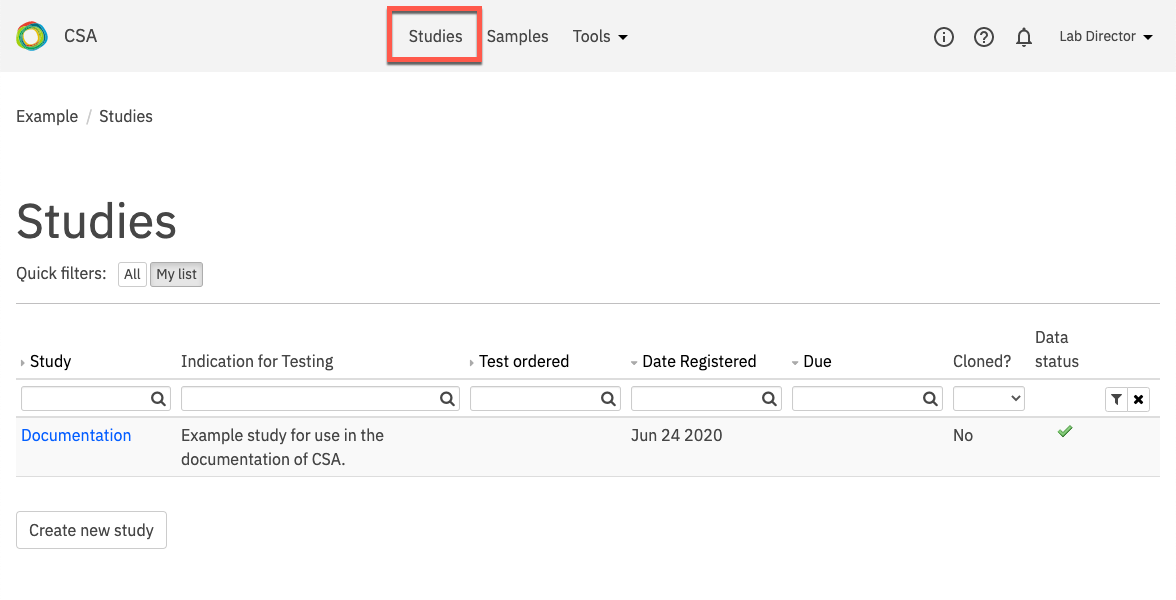
On the Studies page, select the desired study for review. Use the Quick filters at the top of the page to filter studies that are due for review and/or are assigned to you. Note that the assignment of projects is a feature that can be enabled by your administrator and may not be active in your system.
On the Study Overview page of the selected study, multiple tabs display study-specific information, including the following:
Study information - Review basic study information.
Comments - Review internal comments.
Change history - Review the case history.
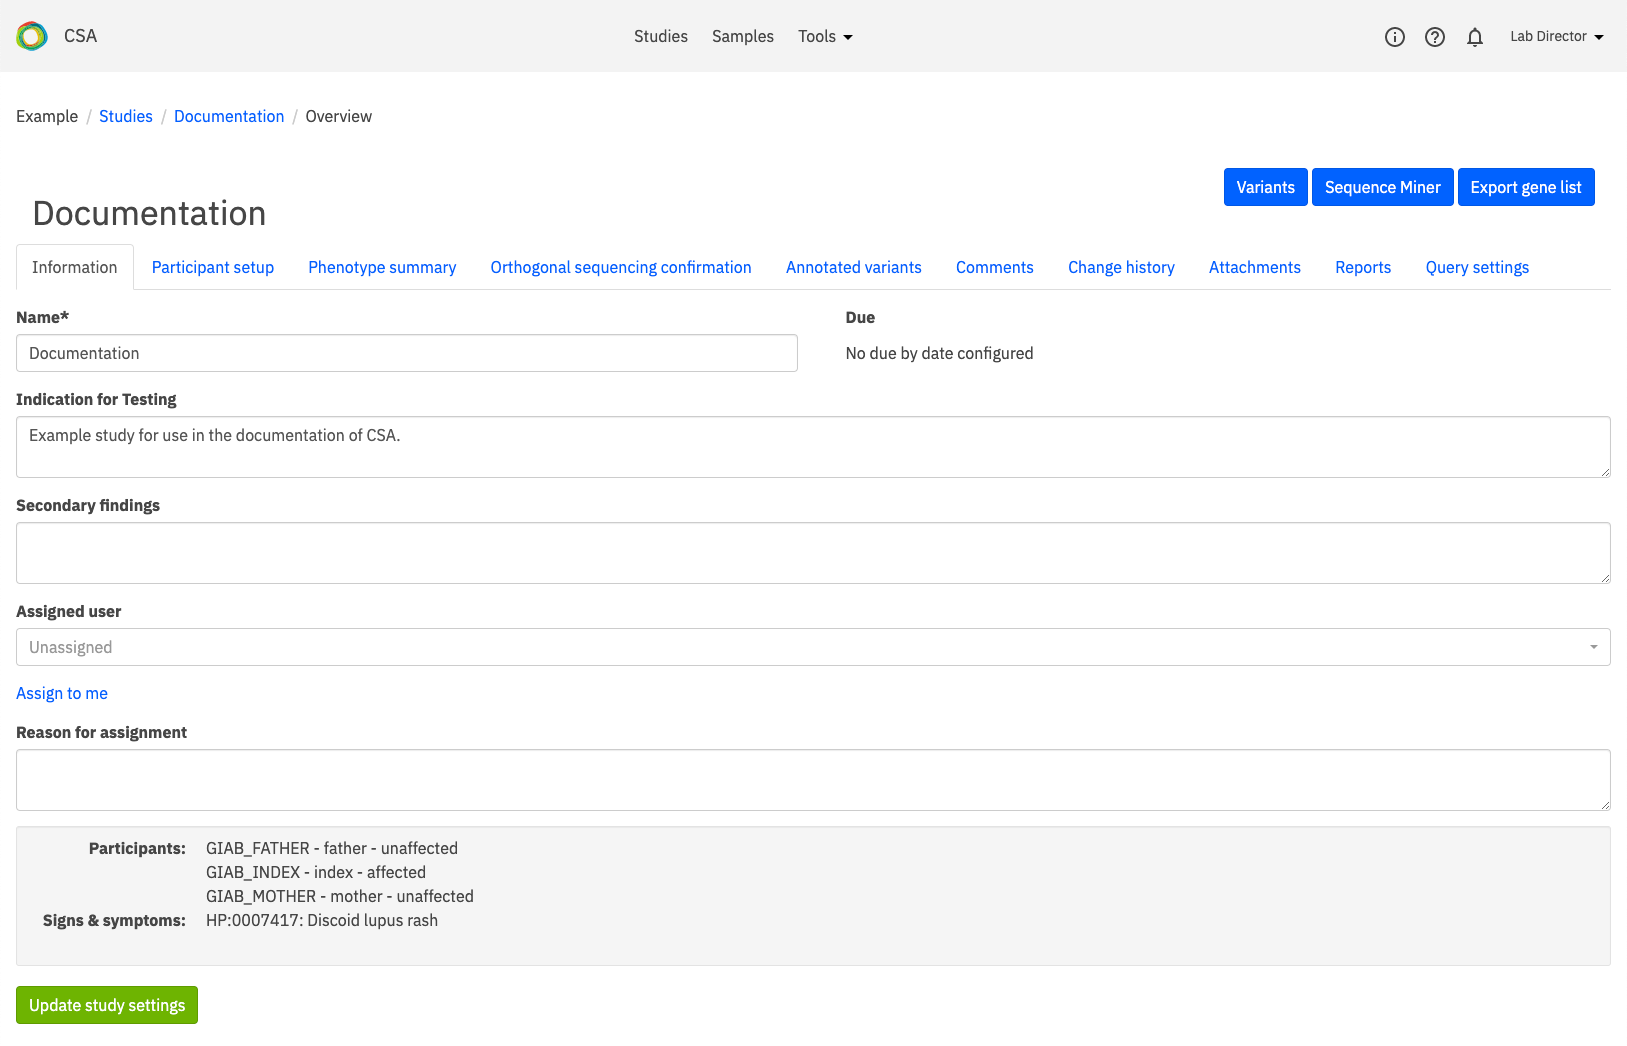
To review the variant listing, click the Variants link that is indicated below.

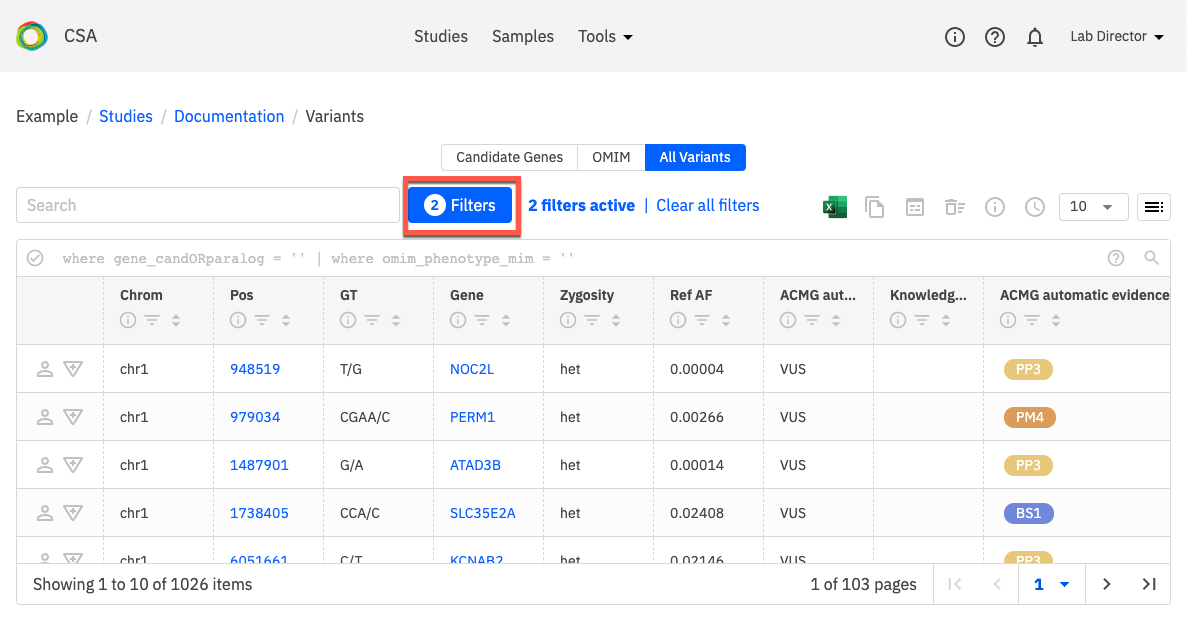
When the Variants page opens, click on All variants to see a list of all variants. You can also open the Filters (shown below) to select variants that have some annotations for review.
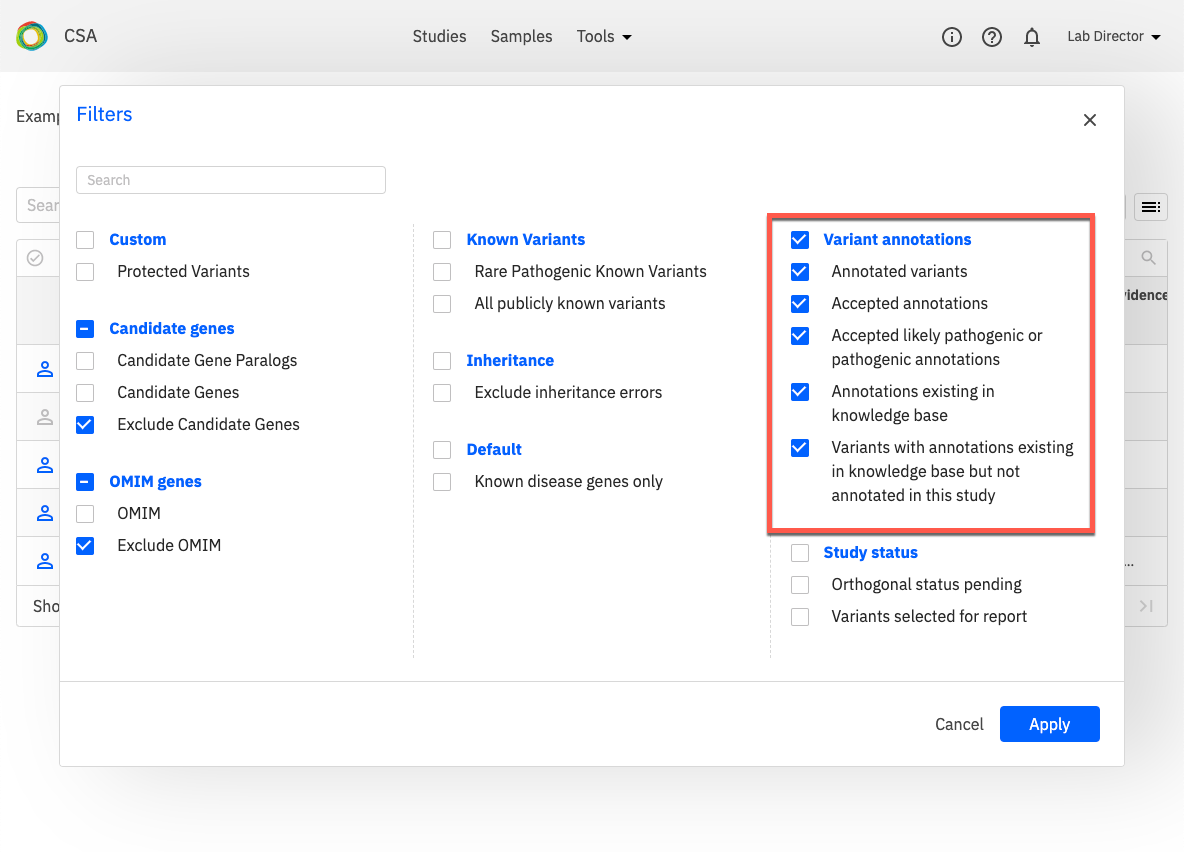
Apply filters for Variant annotations to filter variants that have been worked on.
To review or edit the Variant Summary or Variant Curation for a selected variant, click the icons in the leftmost column in the row.

See also:
Step 3: Review draft reports for approval or rejection
On the Reports tab of the Study Overview, select a report for review and click Open on the right-hand side of the row to review the draft report. To edit the report, click Edit.
If the selected report passes review and is ready for approval, click Approve. This action locks the report to prevent further editing. If you uploaded a custom signature, it will be automatically added to the report.

To review the approved report, click Open approved PDF.
Note
If the case should be returned to the variant scientist(s) for additional review, open the Study information tab and set the Case status to “Variant review” or modify the Assigned user field to assign the study to another user.
See also:
Step 4: Update study details
Once the study has been reviewed and the report has been approved, open the Study information tab and set the Case status to “Report Delivery”.
Confirm the Assigned user field is set to “Unassigned”.

See also: Managing Studies